Install phpLogCon with IIS6.0
Article created 2008-10-14 by Tom Bergfeld.
In this paper, I describe how to install phpLogCon with IIS6.0. It is intentionally a brief step-by-step guide, targeted to those who want to quickly get it up and running. For more elaborate information about phpLogCon, please consult the phpLogCon manual set.
Installing IIS
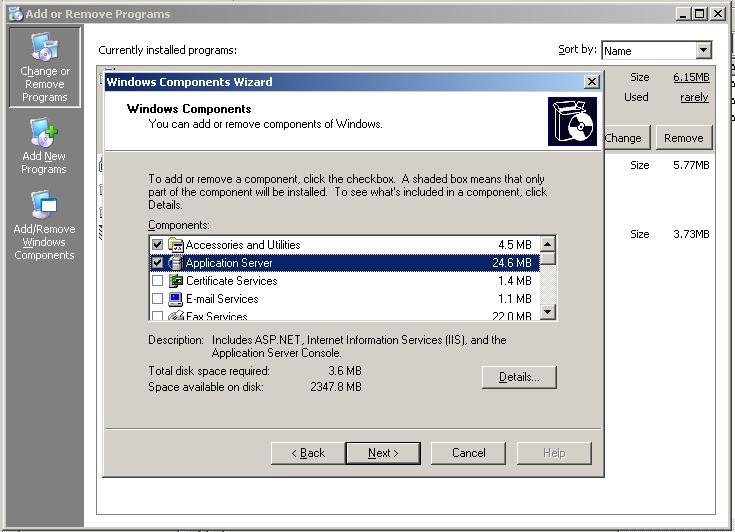
If you don’t use IIS so far, you have to install it now. You just need your Windows-Installation-CD. Go to “Add or Remove Programs” in your Control Panel. There you will find IIS by clicking “Add or Remove Windows Components” (in some cases like Windows Server 2003 IIS is in “Application Server”).
Choose it and follow the install instructions.
To check if the install was correct open your browser and type “localhost” in your navigation bar. You should see the following screen (it’s the default startscreen of the IIS).

Downloading PHP-installer
Here you will find the PHP installer. Download it and follow the instructions of the installer. A simple test should show if the install was correct. Create a simple test.php-file in your webbrowser folder (default IIS folder c:\Inetpub\wwwroot) and try to open it via your browser. I created a simple test.php for you, that you can use to test your PHP by clicking here or download it.
Downloading phpLogCon
For obvious reasons, you need to download phpLogCon.
Load the most recent build from here.
Installing phpLogCon
Perhaps you will need to download and install third party software like WinRAR to unpack the downloaded phpLogCon tar.gz file.
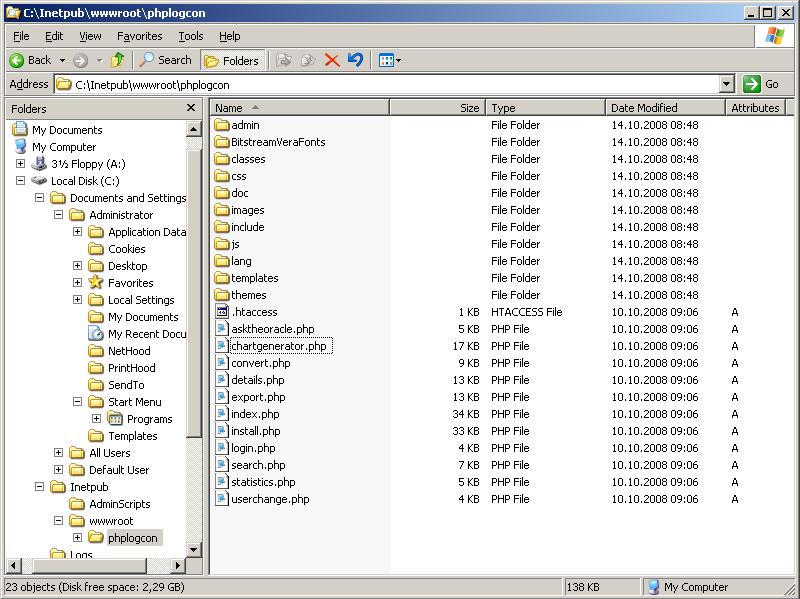
Open the windows explorer and go to the Inetpub\wwwroot folder of your IIS web server, which is the folder where you can place html/php files. Create a new folder called phplogcon there.
If you downloaded and unpacked phpLogCon, copy or move the content of the src folder into the C:\Inetpub\wwwroot\phplogcon folder.
The explorer window should be like in the screenshot now.
Before you can start the real install you have to set write permissions in the settings of the IIS like in the screenshot. Right click on the wwwroot folder -> properties -> security

Now open your phplogcon installation in your favourite webbrowser (localhost/phplogcon), you will see an error, and you will be pointed to the installation script. The install script will guide you through the phplogcon installation, just follow the instructions.

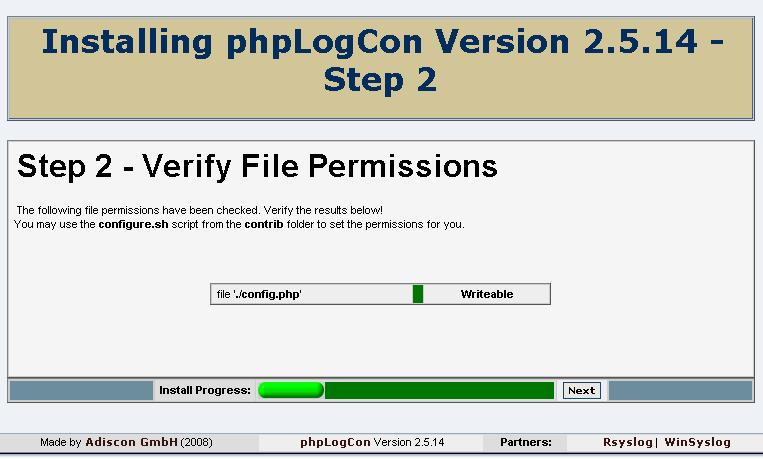
In the first step phpLogCon creates the config.php file in your created phplogcon folder and checks the permissions, if the config.php can be written or not.
In the next steps you can set several basic options.
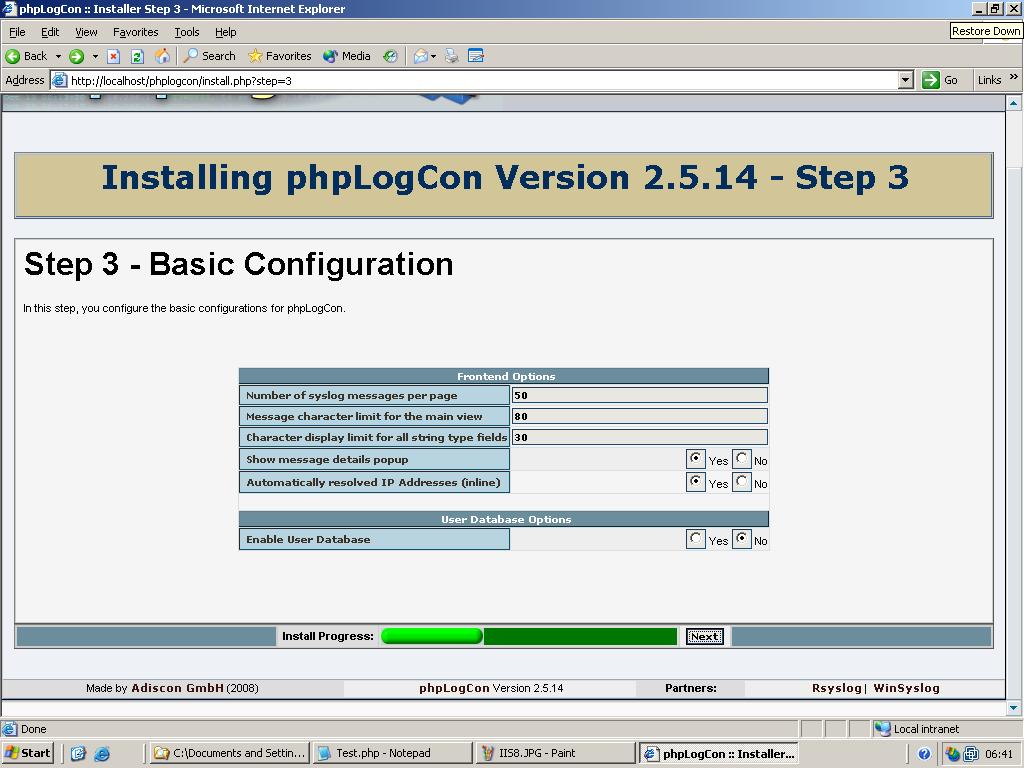
Number of syslog messages per page = 50 (default)
This is the number of syslog messages displayed on each page. You can increase the value (makes phpLogCon slower) or decrease the value (makes it faster).
Message character limit for the main view = 80 (default)
Set the number of characters per message which will be shown in the last column of the main view. Full messages can be reviewed by hovering the mouse over it.
Show message details popup (default yes) = yes (default)
Here you can set, if you want the small window with the complete message to pop up if you are hovering over a event with the cursor. If you choose “No”, then you have to click on the message to see the details.
Create the first source for syslog messages.
Step 7 is the most important. Here, you will configure your first data source, which holds all your syslog data. Mainly, you have to choose a “Name of the Source” and a “Source Type”. The name will be displayed later in a drop-down menu with which you choose your active syslog source. The “Source Type” can be a file, a MySQL database or the PHP PDO which supports different database types like mssql, PostgreSQL, odbc, oracle or even ibm db2.
If you choose the diskfile,like in our case, you have to provide the following information:
Logline Type = Syslog / Rsyslog (default) or Adiscon WinSyslog
This tells phpLogCon, how the lines look like. This is necessary for showing the log messages properly.
Syslog File = /var/log/syslog (default)
This is the position of the logfile in your file system.
The only thing we have to change is the Syslog File into the folder of your choice. I created a file called Webserver.log in the folder c:\Logs, therefore my screen looks like this.

You are done!
In the next step you finish your install. The last thing you have to do is to delete or rename your install.php in your
c:\Inetpub\wwwroot\phplogcon folder to avoid a reinstall everytime you start your phpLogCon.