Step 3 – Setting up the other Windows Servers
We already have the central server and the regular Windows clients set up. We now need to set up the other Windows servers. We assume, that we have other Windows 2008 Servers. On these servers we want to monitor the local Event Log and textfile-based log files. The log messages shall be transferred to the central server via TCP again.
To achieve this, we need MonitorWare Agent installed on those servers. This is simply because it is able to monitor textfiles in addition to the regular Event Log. In addition to MonitorWare Agent, we need nothing to be installed. Since we want to monitor textfile-based log files, we assume there is an IIS running.
Step 3.1
First, we will set up the ruleset. By doing this, we can create the services and they will automatically bound to the ruleset.
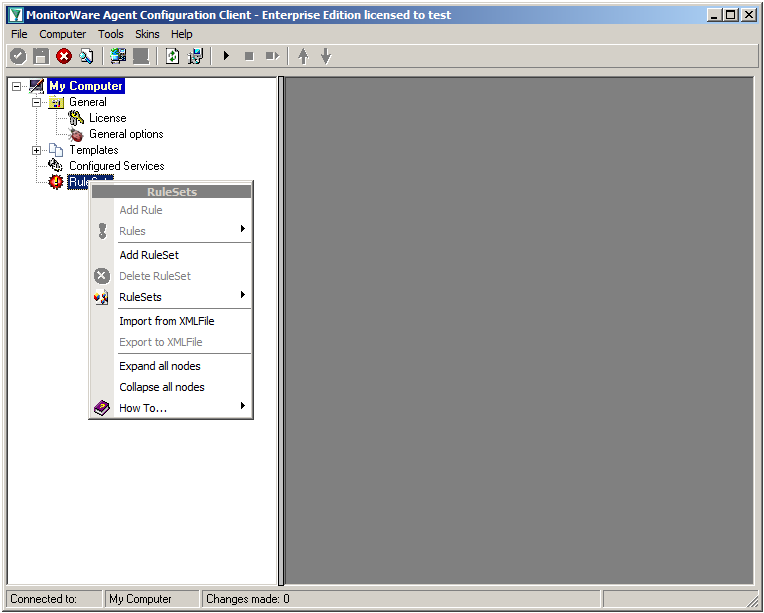
Right-click on RuleSets in the left hand list. A context menu will appear. Click on Add RuleSet
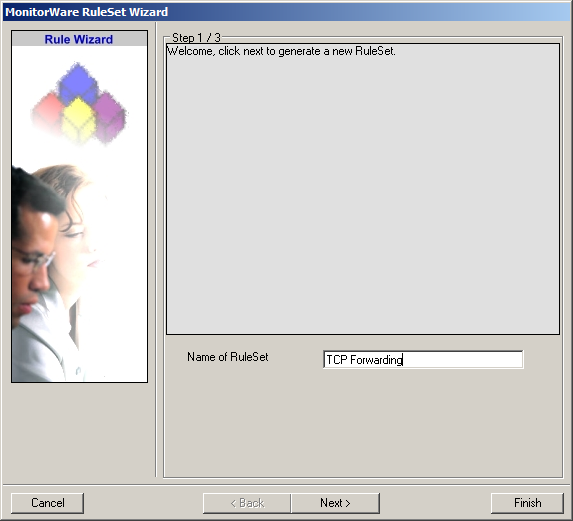
The RuleSet Wizard will appear now. You can give your ruleset a name of course. We will use TCP Forwarding for this example. After that, click on “Next”.
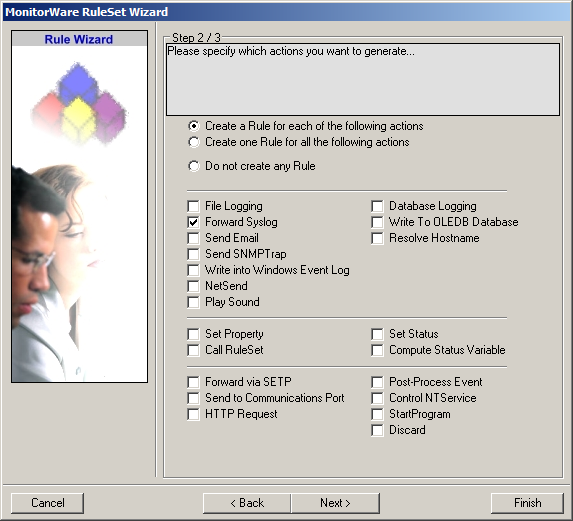
On the second page of the wizard we can specify what actions we want. Since we only want the log messages to be forwarded via syslog, check the box next to “Forward Syslog”. After that, click “Finish” to create the ruleset and action.
Step 3.2
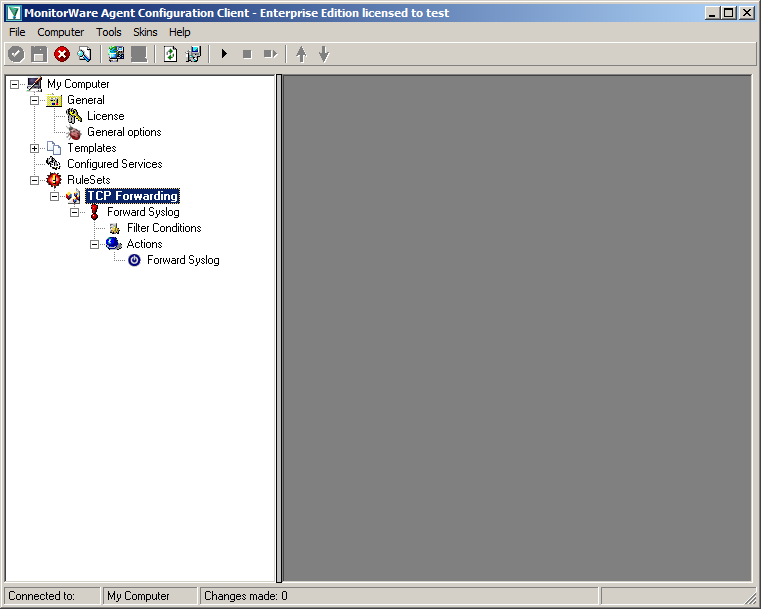
When you expand the treeview now, you will find a rule named “Forward Syslog” with an attached action of the same name.
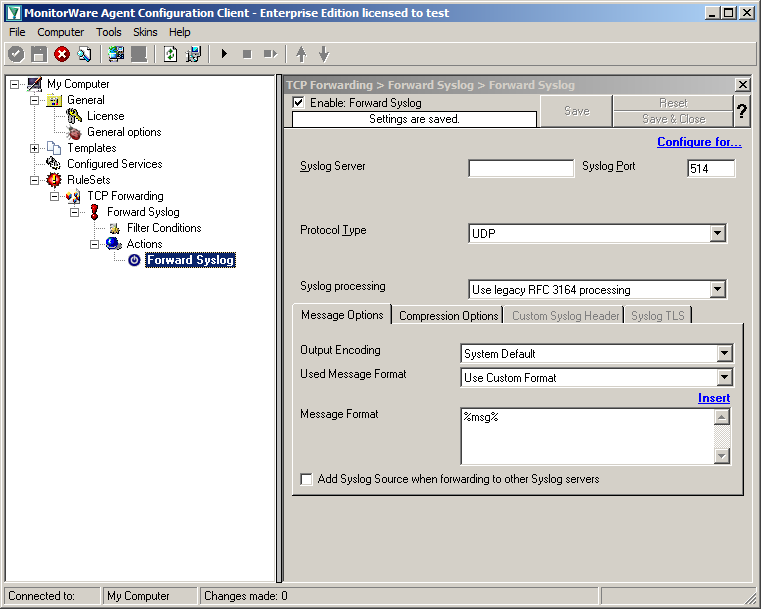
Now click on the action “Forward Syslog. You can see the default values now.
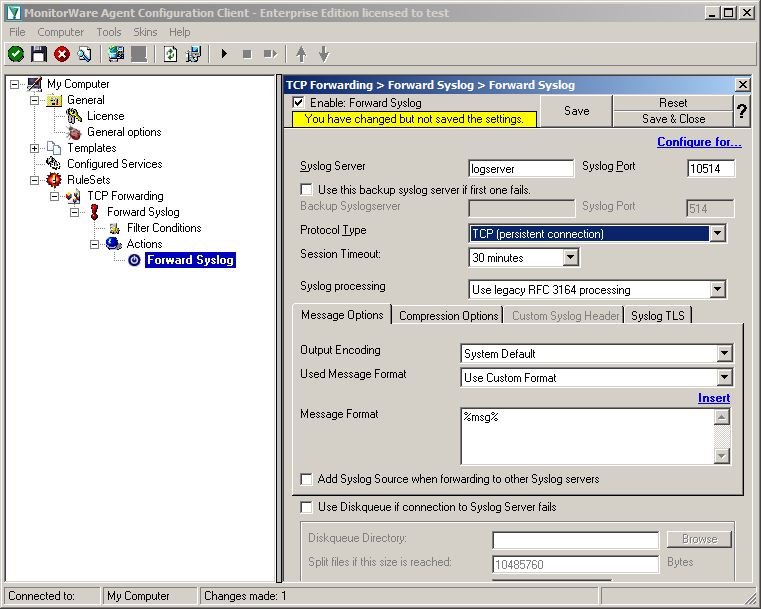
We need to change some of those settings now. First of all we need to enter the IP or hostname of our central server into the field “Syslog Server”. After that, change the port to 10514, since our central server will listen to syslog on this port. And we need to change the protocol type. Change is to TCP (persistent connection). That is all for now. Click on the Save button on the top so we can go on configuring the Service itself.
Step 3.3
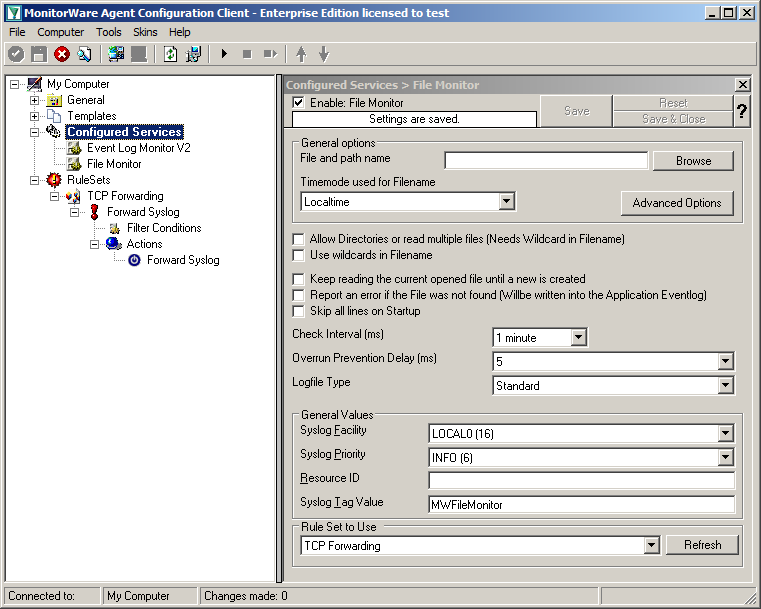
Currently, when clicking on Configured Services you will not see a thing. But we will configure the services now. Without them, MonitorWare Agent is not able to get any log messages. We will setup 1 EventLog Monitor and 1 File Monitor.
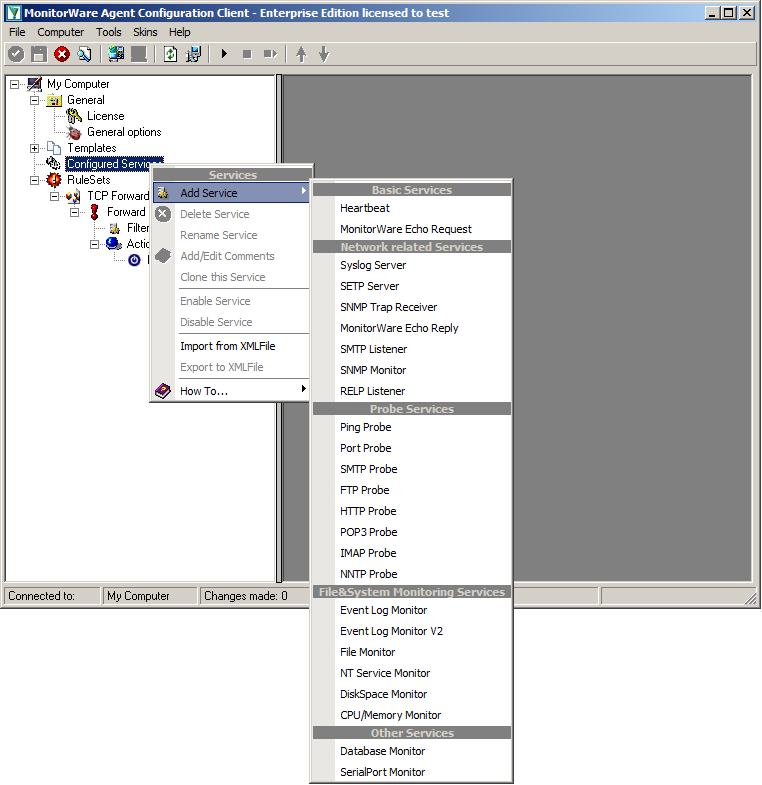
When right clicking on Configured Services a context-menu will open. By moving your cursor to “Add Service” you can see a list of Services, that may be configured. The list seems pretty long, but we basically need 2 services of them.
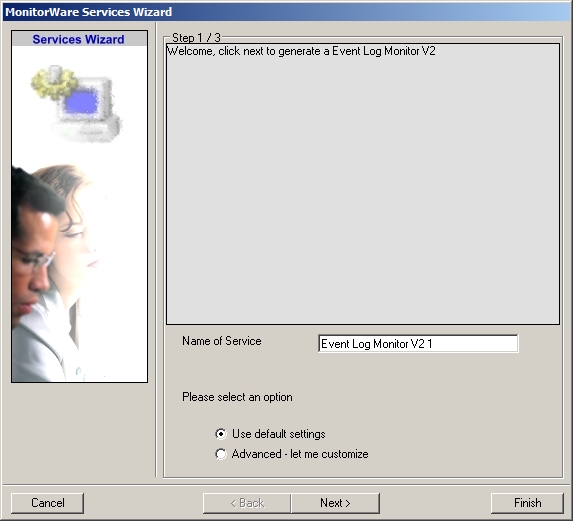
Click on “EventLog Monitor V2” first. The Services Wizard will open. Simply click on Finish for now. Repeat this again for the File Monitor.
In the end, you should have a list with 2 Services. For our example I renamed the services by doing a right-click on the Service name I wanted to change and the choosing “Rename Service”.
Step 3.4
Settings for Event Log Monitor V2
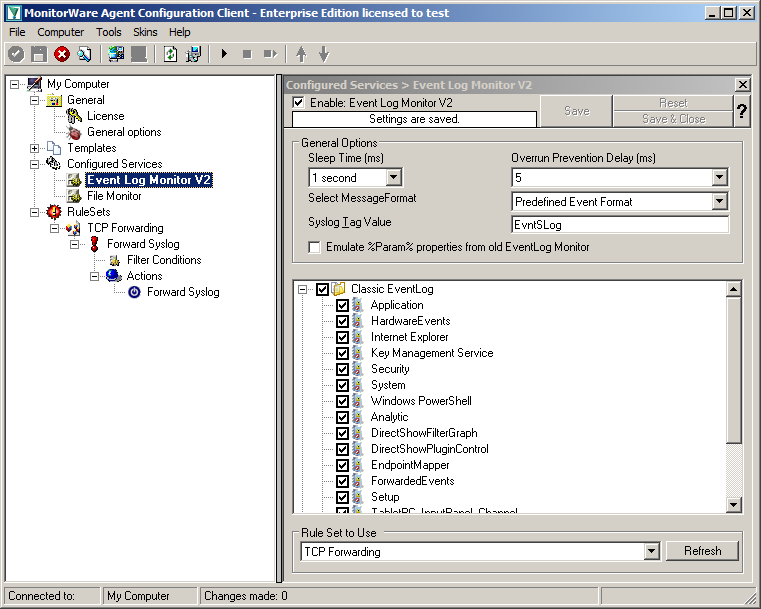
The Event Log Monitor V2 needs no additional setup. Again the default values are ok. If you want specific Event categories not to be stored, you can disable the options. But the basic format is sufficient.
Step 3.5
Settings for File Monitor

The File Monitor needs some additional settings. First, enable the option “Allow Directories or read multiple files”. You will see, that the use of wildcards will be automatically enabled and some other options completely being disabled.
Then we need to set the source files. For our example, we want to monitor the IIS logfiles. At the top of the File Monitor configuration you can see the option “File and path name”. There is a Browse button right next to it. Click it.
A windows explorer window will open, where you can choose the file you want to monitor. Navigate to the path C:\inetpub\logs\LogFiles\W3SVC1\. This is the location where the log files are stored. Please note, that the file location could be different when using another version of IIS. Choose the first file in the list. (Note: Daily Internet Information Server log files are named “u_exyymmdd.log”, with yy being the 2 digit year, mm the month and dd the day of month. To generate the same name with file monitor, use the following name “u_ex%y%m%d.log”.)
Set the Logfile Type to “W3C WebServer Logfile”.
Please note, that this step can be easily adapted for other log files (e.g. DHCP log files) as well.
Step 3 – finished
We have now finished setting up the other server. You only need to Save the configuration and start the Service with the “Play” button at the top of the Configuration Client. MonitorWare Agent will pull the logs from the Event Log and the text files and forward them via TCP syslog to our central log server.