Can I use the old EventLog Monitor with Vista?

Can I use the old EventLog Monitor with Vista?

Created 2007-04-18 by Florian Riedl.

Windows Vista available since early 2007. Due to the changes Microsoft introduced with Vista, the procedure for monitoring event logs with the non-Vista event log monitor has changed.  Adiscon introduced the native Vista EventLog Monitor V2 which requires no specific prerequisites. Some customers still prefer to use the previous EventLog Monitor. We recommend against this. However, there may be some reasons for doing so. If so, you have to go to “Control Panel -> Administrative Tools -> Services”. In the list of Windows internal services you have to find the service named “Remote Registry” and start it.

Remote Registry Service

Once the Service is started, you are able to fully use the old EventLog Monitor again, just like if you use Windows XP. Please keep in mind that only the XP-like subset of event logging is available via that monitor. To fully process Vista event logs, you need to switch to the V2 event log monitor.

Customers with further questions should kindly contact Adiscon support at support@adiscon.com.

How To setup a Start Program Action

How To setup a Start Program Action

Article created 2007-04-12 by Florian Riedl.

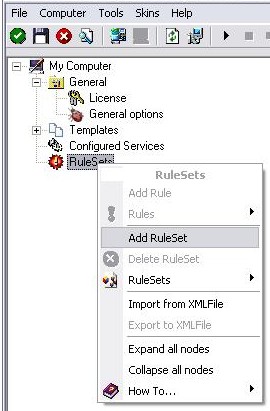
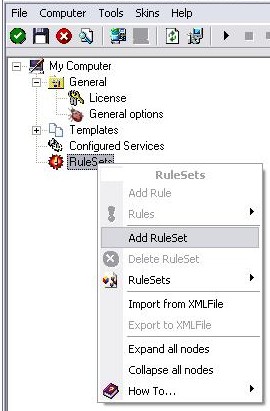
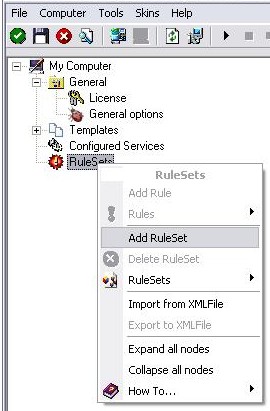
1. First we define a new rule set. Right-click “Rules”. A pop up menu will appear. Select “Add Rule Set” from this menu. On screen, it looks as follows:

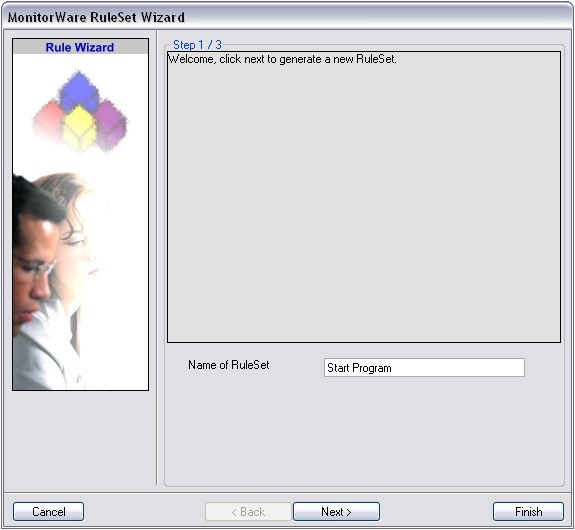
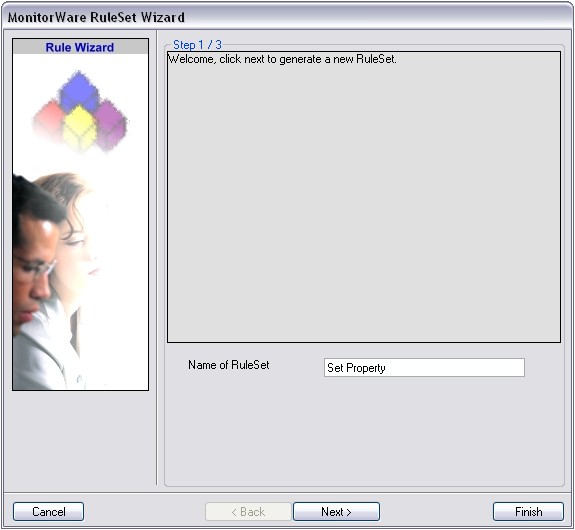
2. Then, a wizard starts. Change the name of the rule to whatever name you like. We will use “Start Program” in this example. The screen looks as follows:


Click “Next” to go on with the next step.

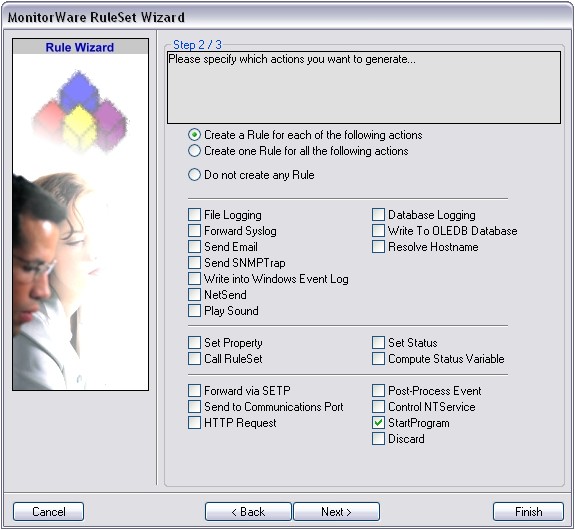
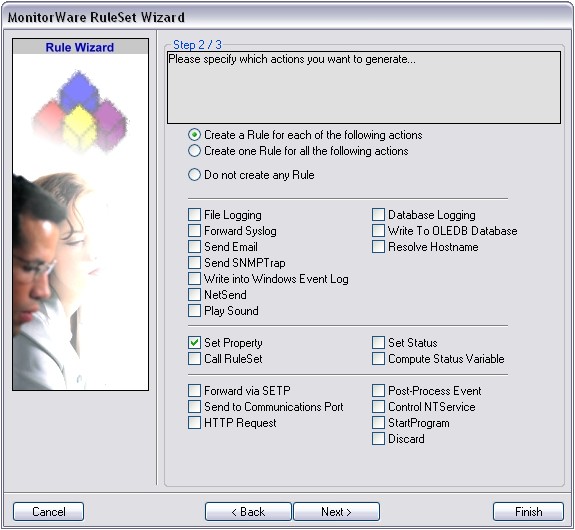
3. Select only “Start Program”. Do not select any other options for this sample. Also, leave the “Create a Rule for each of the following actions” setting selected. Click “Next”. You will see a confirmation page. Click “Finish” to create the rule set.

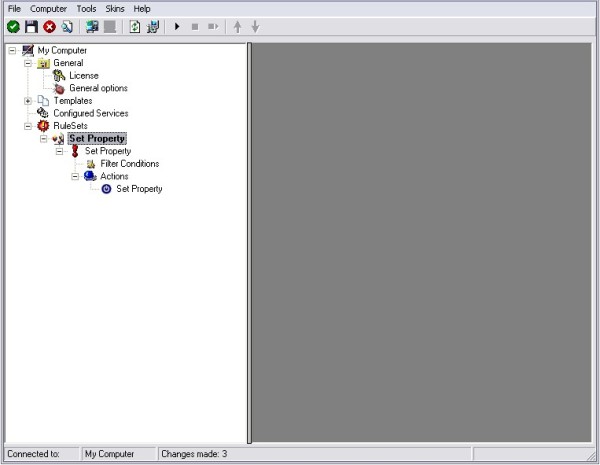
4. As you can see, the new Rule Set “Set Property” is present. Please expand it in the tree view until the action level of the “Set Property” Rule and select the “Set Property” action to configure.

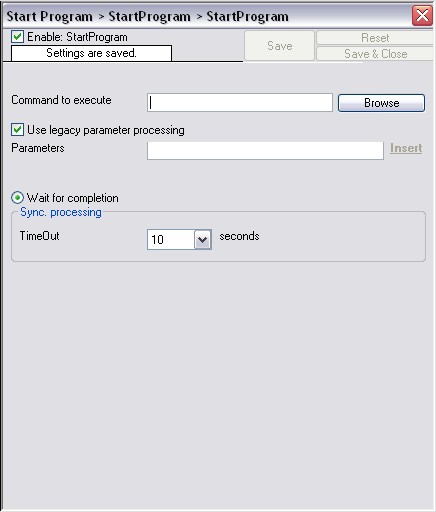
5. You can use this action to start programs and scripts on the occurence of special Events. Mostly this action is used in conjunction with strict filter settings. It allows you to begin with counter-measures if something happens.

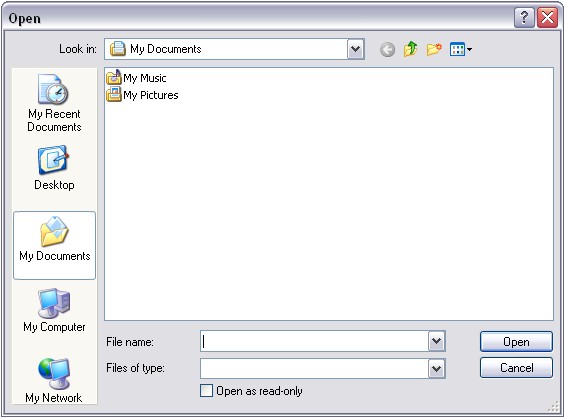
6. By clicking on the “Browse”-Button a windows opens up. Here you can specify the program or script you want to use. After that you can specify special parameters that should be used upon execution. These will be used as command-line parameters. Further there are parameters available which refer directly to message properties. That way you can use information from the messages as parameters. For more information on these, refer to the manual
internal property list

7. Finally, make sure you press the “Save” button – otherwise your changes will not be applied. Then start the service and you are done.

How To setup EventLogMonitor V2 Service

How To setup EventLogMonitor V2 Service

Article created 2007-04-10 by Florian Riedl
Article updated 2011-05-25 by Tom Bergfeld.

Please note:

Starting with EventReporter 8.3 and MonitorWare Agent 4.3 two different event log monitor services are provided. They are called “Event Log Monitor” (V1) and “Event Log Monitor V2”. In short, the V2 version is recommended for Windows Vista (and above, e.g. Longhorn Server) while the other version is for previous releases of Windows (NT, 2000, 2003, XP). Please find more information about the different EventLogMonitors at Which Event Log Monitor to use.
There is also a guide How To setup EventLogMonitor V1 Service.

1. First, right click on “Services”, then select “Add Service” and then “Event Log Monitor V2”:
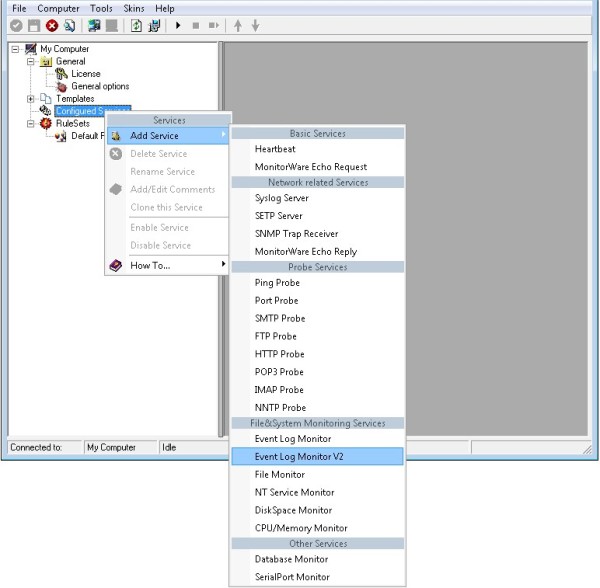
create service

2. Once you have done so, a new wizard starts.
If the following Popup appears, please select “Create Service”:
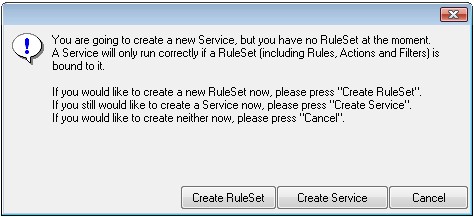
create the service

Again, you can use either the default name or any one you like. We will use the default name in this sample. Leave the “Use default settings” selected and press “Next”.
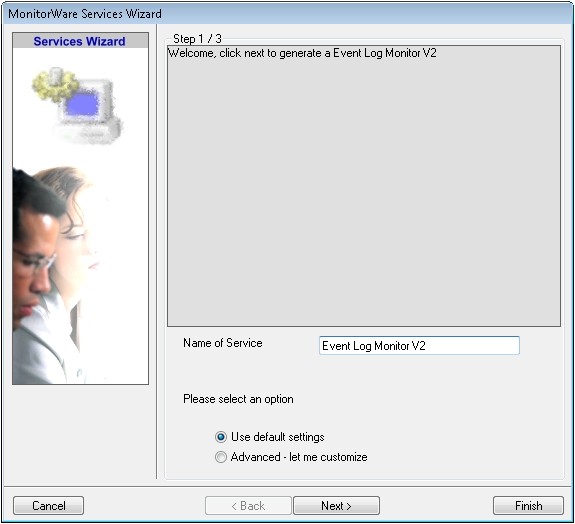
service name

3. As we have used the default, the wizard will immediately proceed with step 3, the confirmation page. Press “Finish” to create the service. The wizard completes and returns to the configuration client.

4. Now, you will see the newly created service beneath the “Services” as part of the tree view. To check its parameters, select it:
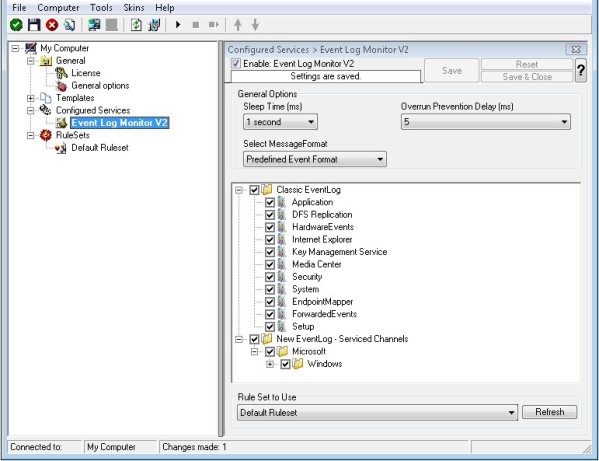
view service
As you can see, the service has been created with the default parameters.

Note: The “Default RuleSet” has been automatically assigned as the rule set to use. By default, the wizard will always assign the first rule set visible in the tree view to new services.

5. Finally we, bind a ruleset to this service. If you already have a ruleset, simply choose one. If not, then you will have to create one, or insert the actions you want to take in the default ruleset.
Remember, this is only an example. You can do it in any way you want.
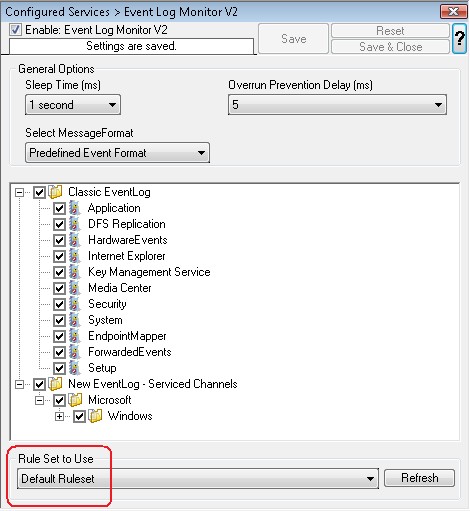
6. The last step is to save the changes and start the service. This procedure completes the configuration of the syslog server.

The NT Service cannot dynamically read changed configurations. As such, it needs to be restarted after such changes. In our sample, the service was not yet started, so we simply need to start it. If it already runs, you need to restart it.

That’s it. This is how you create a simple EventLog Monitor V2 for Vista.

I get format message errors (code 317). What does this mean?

I get format message errors (code 317). What does this mean?

Created 2007-04-10 by Florian Riedl.

You can come across this specific error, by reviewing your EventLog data. The EventLog Monitor writes an entry to the EventLog and then retries. If debug is activated, a entry will be created there, too, looking like this:
“2212 | 1175784330 | Error | Error FormatMessage return 0, GetLastError = ‘317’”

The reason for this error is, that there is something wrong with the source of the message. Mostly this could happen if the EventLog Monitor reads events for applications, which are no longer installed. Another cause could be, that the source simply is corrupted. In these cases this error occurs. Basically spoken, this is not a problem of the EventLog Monitor, but a problem of the system itself having inaccurate sources.

In general, there is no real problem. The EventLog Monitor will continue to work just fine. It will simply go on with its run. Therefore you shouldn’t panic if this error occurs. It will be very helpful to first think about which application caused the entry and then check if it is proper installed. If it doesn’t occur too often, it isn’t even worthy bothering.

If you need further information about format message errors or have questions and ideas concerning our products, send a mail to our Support Team.

Which Event Log Monitor to use for Vista?

Which Event Log Monitor to use for Vista?

Created 2007-04-10 by Rainer Gerhards.

Starting with EventReporter 8.3 and MonitorWare Agent 4.3 two different event log monitor services are provided. They are called “Event Log Monitor” (V1) and “Event Log Monitor V2”. In short, the V2 version is recommended for Windows Vista (and above, e.g. Longhorn Server) while the other version is for previous releases of Windows (NT, 2000, 2003, XP).

But why does Adiscon provide two different event log monitors and not combine them into a single one? The root cause is a change in Windows. Windows Vista comes with a totally new event logging system. While to the casual user it looks quite similar to the previous system, it actually was re-designed from scratch (at least to the best of my knowledge). Microsoft realized that the old system was too limited to catch up with today’s administrative and auditing needs. Instead of trying to add more and more bells and whistles to the old  system, Microsoft did the right thing and engineered a new, well designed one. That new system provides a compatibility layer which will make it look familiar to the user. The layer also emulates the previous API calls. For that reason, even our V1 event log monitor works quite well. It, too, could be used to poll Vista logs. However, there are a number of good reasons to use the V2 version:

  • support the variety of new Vista event logs
  • support for new and improved message formats
  • great performance thanks to using native APIs and event subscriptions
  • there are some subtle compatibility problems with the legacy APIs. We assume that Microsoft fixes that in some point in the future. But why wrangle with problems when you can avoid them?
  • the V2 monitor is a Vista native and thus performs well and very robust

The V2 event log monitor is not available on Windows 2000, 2003 and XP because the required APIs are not available on those platforms.

Customers interested in monitoring Windows Vista as well as Windows 2000, 2003 and XP systems can do that form a single machine. To do so, V1 and V2 event log monitors can be combined. Multiple of them can be configured and running at the same time. The only restriction is that this EventReporter/MonitorWare Agent must run on a Vista machine because only Vista provides the necessary APIs for the V2 monitor. Customers with further questions should kindly contact Adiscon support at support@adiscon.com.


How To setup a Control NT Service Action

How To setup a Control NT Service Action

Article created 2007-04-05 by Florian Riedl.

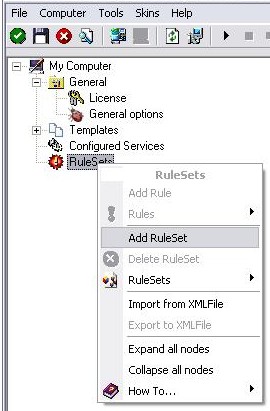
1. First we define a new rule set. Right-click “Rules”. A pop up menu will appear. Select “Add Rule Set” from this menu. On screen, it looks as follows:

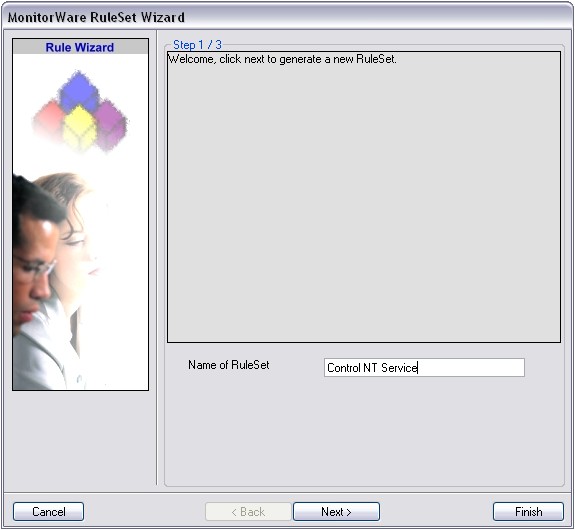
2. Then, a wizard starts. Change the name of the rule to whatever name you like. We will use “Control NT Service” in this example. The screen looks as follows:


Click “Next” to go on with the next step.

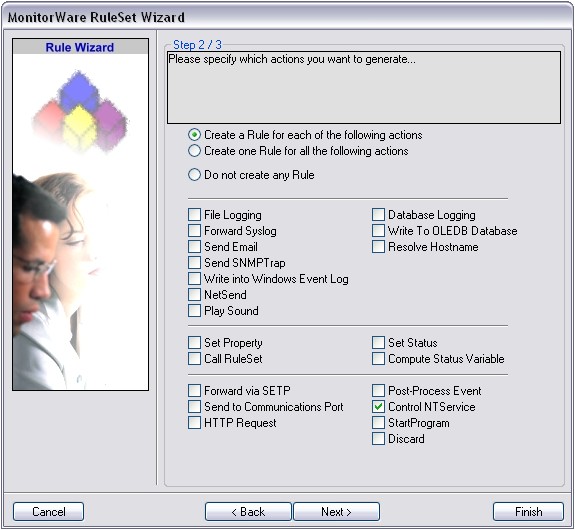
3. Select only “Control NT Service”. Do not select any other options for this sample. Also, leave the “Create a Rule for each of the following actions” setting selected. Click “Next”. You will see a confirmation page. Click “Finish” to create the rule set.

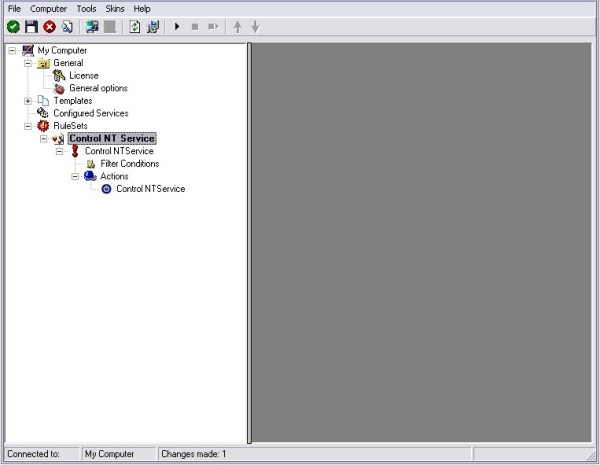
4. As you can see, the new Rule Set “Control NT Service” is present. Please expand it in the tree view until the action level of the “Control NT Service” Rule and select the “Control NT Service” action to configure.

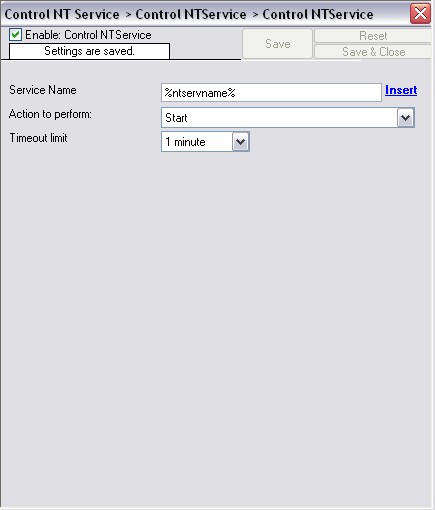
5. Here you can configure the control options which include the service name (which is the actual service name, not the display name), the action to perform and a timeout value. For the service name, you can take a concrete name for a specific service or leave the property in conjunction with the NT Service Monitor. For now we leave the default values.

6. Finally, make sure you press the “Save” button – otherwise your changes will not be applied. Then start the service and you are done.

How To setup a Set Status Action

How To setup a Set Status Action

Article created 2007-04-05 by Florian Riedl.

1. First we define a new rule set. Right-click “Rules”. A pop up menu will appear. Select “Add Rule Set” from this menu. On screen, it looks as follows:

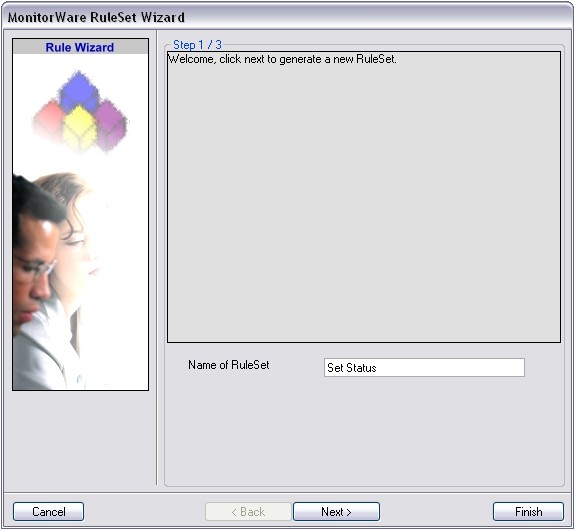
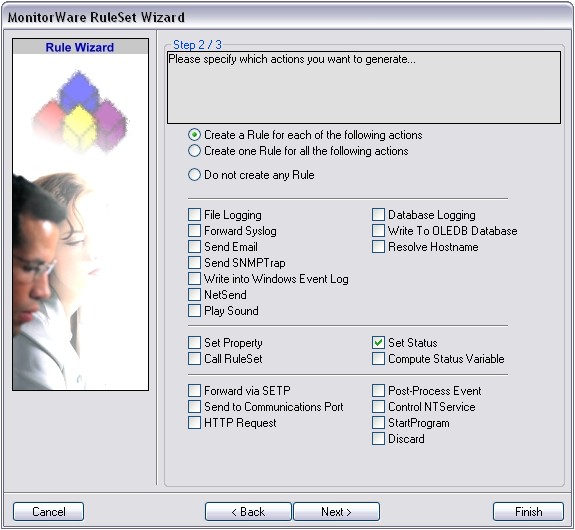
2. Then, a wizard starts. Change the name of the rule to whatever name you like. We will use “Set Status” in this example. The screen looks as follows:


Click “Next” to go on with the next step.

3. Select only “Set Status”. Do not select any other options for this sample. Also, leave the “Create a Rule for each of the following actions” setting selected. Click “Next”. You will see a confirmation page. Click “Finish” to create the rule set.

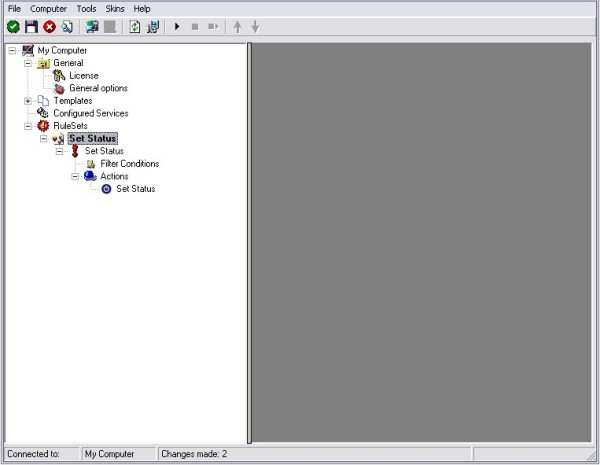
4. As you can see, the new Rule Set “Set Status” is present. Please expand it in the tree view until the action level of the “Set Status” Rule and select the “Set Status” action to configure.

5. With this action you can create your own properties which can be used in the whole rule and filter engine. Or you can take a already existing property and just change it’s value. Properties are a variable for specified information units. More detailed information is available in the manual.

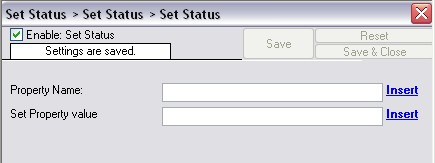
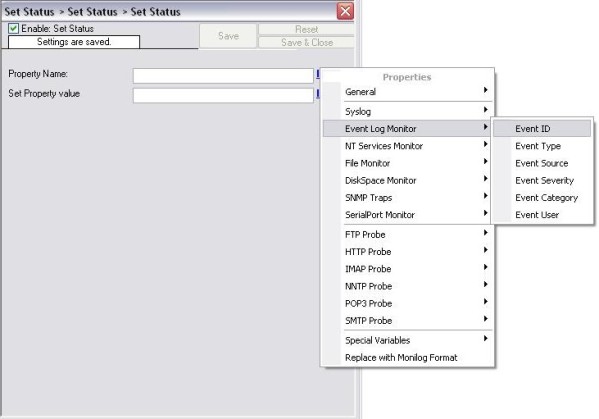
6. You can enter your own property name in the corresponding field, or choose one from the internal list. For this example I choose the property name secEventID. The “Set Property value” can be filled with any valid value or the property replacement. Here I chose my property to be filled with the EventID value. Click on “Insert” to open the menu with the already available properties. This would look like that.
internal property list

7. Finally, make sure you press the “Save” button – otherwise your changes will not be applied. Then start the service and you are done.

How To setup a Set Property Action

How To setup a Set Property Action

Article created 2007-04-05 by Florian Riedl.

1. First we define a new rule set. Right-click “Rules”. A pop up menu will appear. Select “Add Rule Set” from this menu. On screen, it looks as follows:

2. Then, a wizard starts. Change the name of the rule to whatever name you like. We will use “Set Property” in this example. The screen looks as follows:


Click “Next” to go on with the next step.

3. Select only “Set Property”. Do not select any other options for this sample. Also, leave the “Create a Rule for each of the following actions” setting selected. Click “Next”. You will see a confirmation page. Click “Finish” to create the rule set.

4. As you can see, the new Rule Set “Set Property” is present. Please expand it in the tree view until the action level of the “Set Property” Rule and select the “Set Property” action to configure.

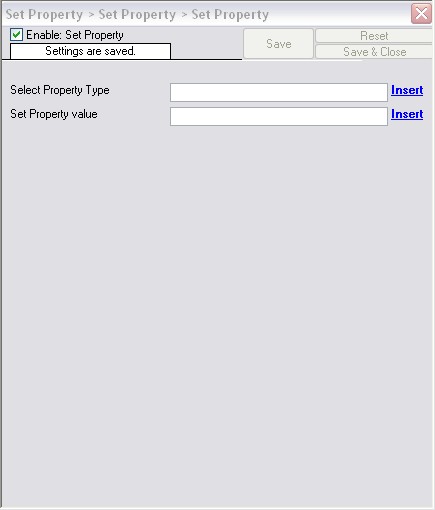
5. With this action you can set your custom properties which then can be used in the whole rule and filter engine with the new values. Or you can take a already existing property and just change it’s value. Properties are a variable for specified information units. More detailed information is available in the manual.

6. You can enter your custom property name in the corresponding field, or choose one from the internal list. For this example I chose to replace the value of the property timegenerated with the value of the property timereported. Click on “Insert” to open the menu with the already available properties. This would look like on the following screen. Of course you could choose your own properties, too.
internal property list

7. Finally, make sure you press the “Save” button – otherwise your changes will not be applied. Then start the service and you are done.

How To setup NT Service Monitor Service

How To setup NT Service Monitor Service

Article created 2007-04-05 by Florian Riedl.

This service helps you keeping track of your running services. At severeal time intervals it checks all services which are in the automatic start state if they are running. If not, a Event is generated and passed to the rule engine for further processing.

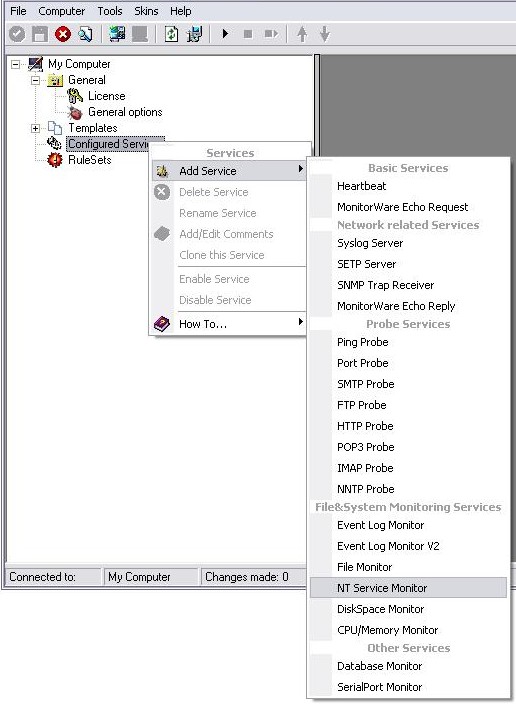
1. First, right click on “Services”, then select “Add Service” and the “NT Service Monitor”.

Once you have done so, a new wizard starts.

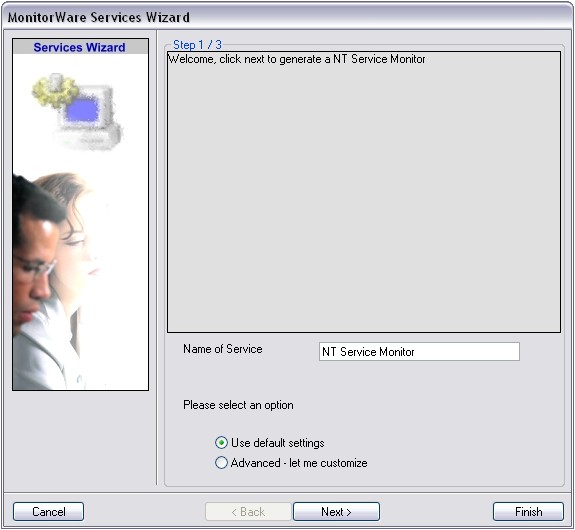
2. Again, you can use either the default name or any one you like. We will use “NT Service Monitor” in this sample. Leave the “Use default settings” selected and press “Next”.

3. As we have used the default, the wizard will immediately proceed with step 3, the confirmation page. Press “Finish” to create the service. The wizard completes and returns to the configuration client.

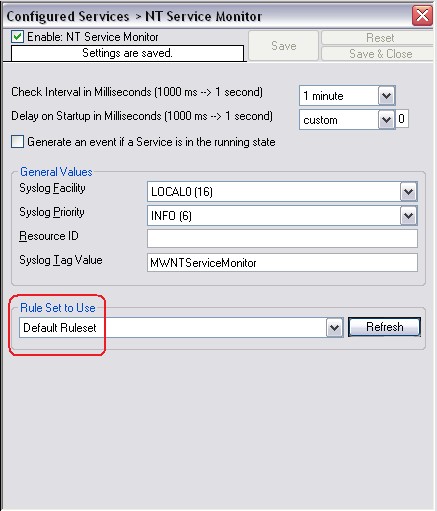
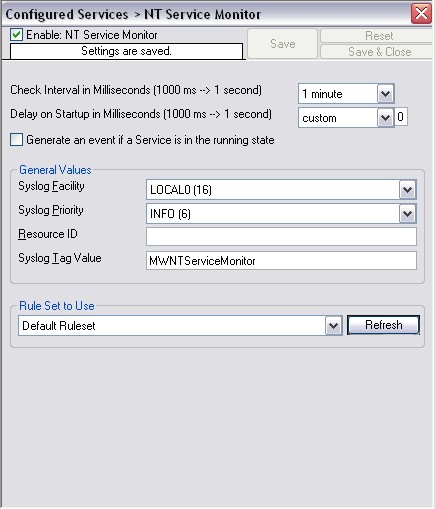
4. Now, you will see the newly created service beneath the “Services” part of the tree view. To check its parameters, select it:

As you can see, the service has been created with the default parameters.

5. The default settings are quite capable. The only thing you should adjust now would be the Check Interval or the Delay on Startup. The first value specifies the time interval when the services are checked. The second value should be altered so that no events will be generated unintentionally after a reboot for example.

6. Now we still need to set a ruleset for this service to work with. Since we have no configured ruleset available at the moment, simply use the Default Ruleset, if it’s not being used automatically. Else you have to adjust this later.

7. Last, save the changes and then restart the application. This procedure completes the configuration of the FileMonitor Service.

The Application cannot dynamically read changed configurations. As such, it needs to be restarted after such changes.

Monitoring MS ISA Firewall Logfiles via syslog

Monitoring MS ISA Firewall Logfiles via syslog

Created 2007-04-02 by Florian Riedl
Information for the usage of this guide. This guide will give you the hints to create a configuration to monitor ISA server logs as well as forward all log data to a syslog server. To make things easier, the guide is split up into several mini-guides, which will each cover one big step of the configuration. These mini-guides only describe the general procedure. You may have to adjust settings like IPs to your personal needs.

Please note: In order to forward the ISA Firewall logs you need MonitorWare Agent.
Further you need to setup your ISA server to log into textfiles. Please review the manual for further instructions. Important: Please ensure that the log format will be W3C logfile format. This is for compatibility reasons.

The scenario looks like this. The configuration we are going to make represents the first machine on the left side.

Step 1

The first step we are gonna take is to create a RuleSet with the corresponfing action. In this case we want to forward our logs via syslog. Therefore we need a “Forward via syslog”-Action. Instructions on how to create a ruleset and setup the action can be found here:
How to Setup a Forward via Syslog Action
Please Note:This is a general guide, you may have to adapt some steps.

Step 2

The next important step is to setup the FileMonitor. We need it to monitor the textfile logs created by your ISA server.
How to Setup the FileMonitor Service
Please Note:This is a general guide, you may have to alter the path- and filename.

Step 3

The last and final step is to click on the Save button if necessary and then start MonitorWare Agent. You are now done. Finally you should receive all the log entries of your EventLog as well as from your ISA Firewall on your syslog server.