Monitoring MS ISA Firewall Logfiles via syslog

Monitoring MS ISA Firewall Logfiles via syslog

Created 2007-04-02 by Florian Riedl
Information for the usage of this guide. This guide will give you the hints to create a configuration to monitor ISA server logs as well as forward all log data to a syslog server. To make things easier, the guide is split up into several mini-guides, which will each cover one big step of the configuration. These mini-guides only describe the general procedure. You may have to adjust settings like IPs to your personal needs.

Please note: In order to forward the ISA Firewall logs you need MonitorWare Agent.
Further you need to setup your ISA server to log into textfiles. Please review the manual for further instructions. Important: Please ensure that the log format will be W3C logfile format. This is for compatibility reasons.

The scenario looks like this. The configuration we are going to make represents the first machine on the left side.
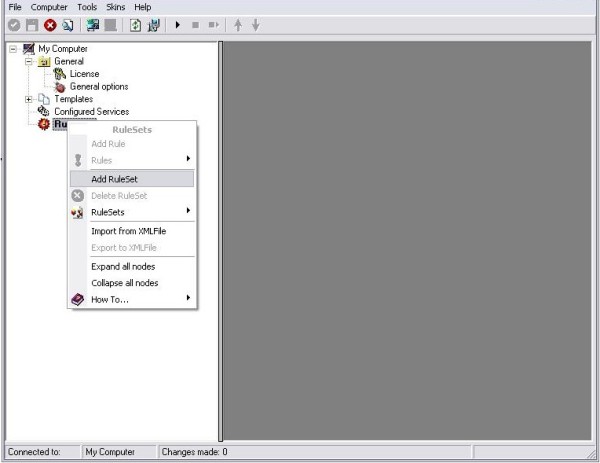
Step 1

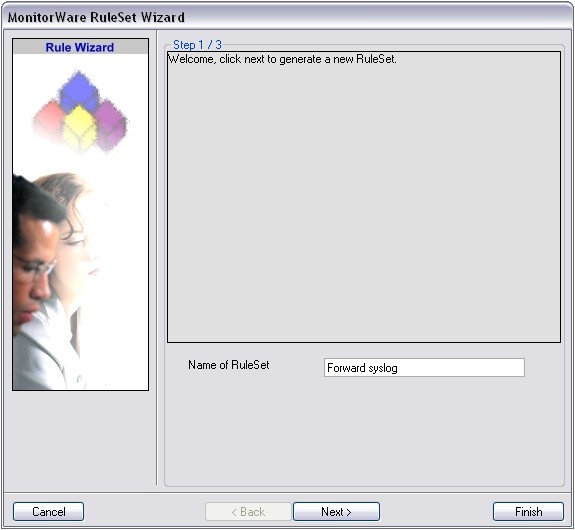
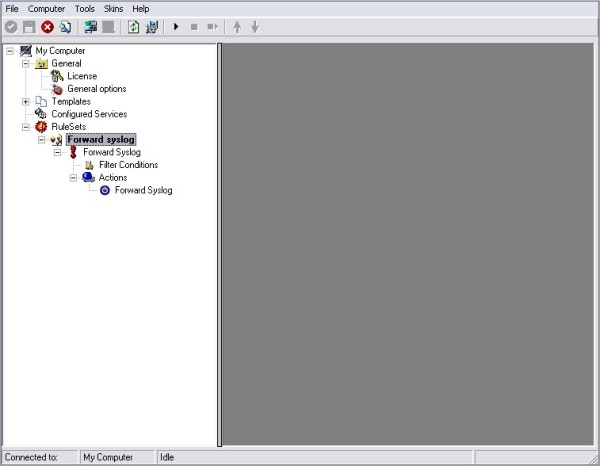
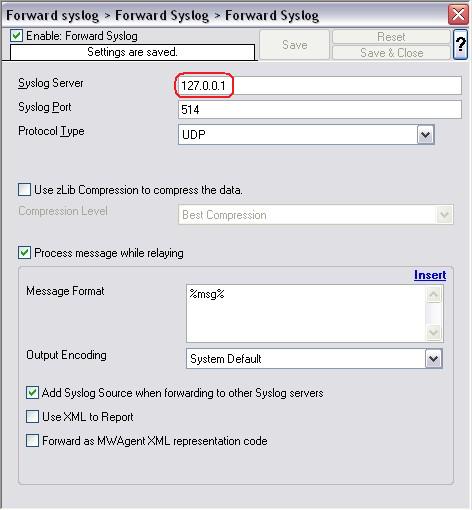
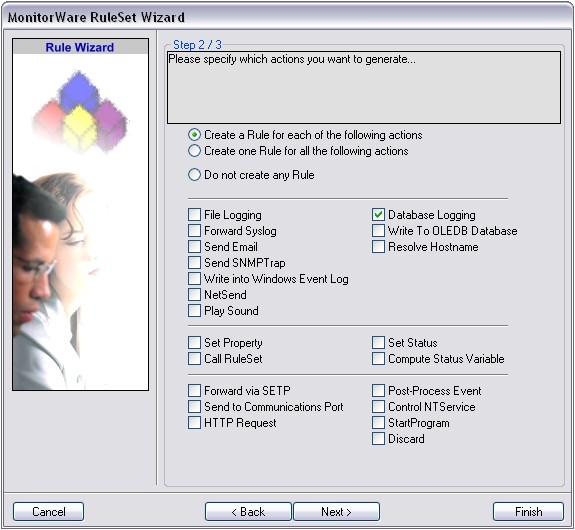
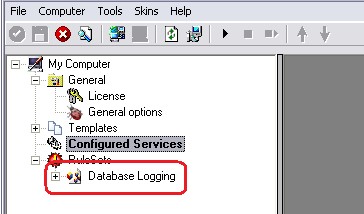
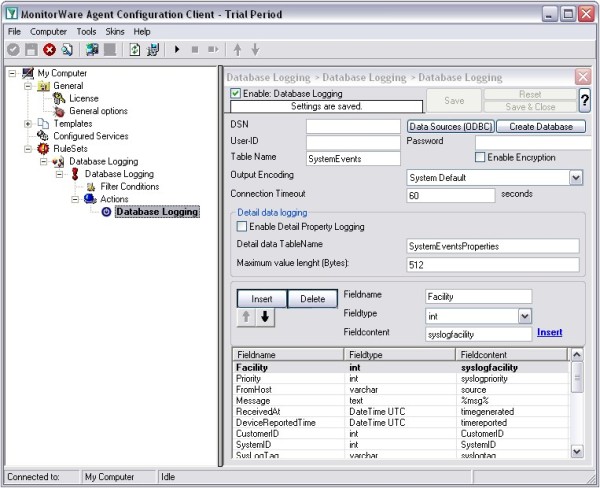
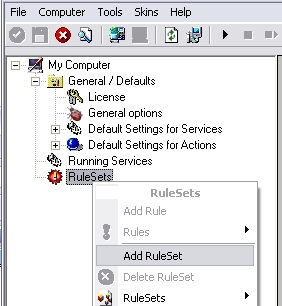
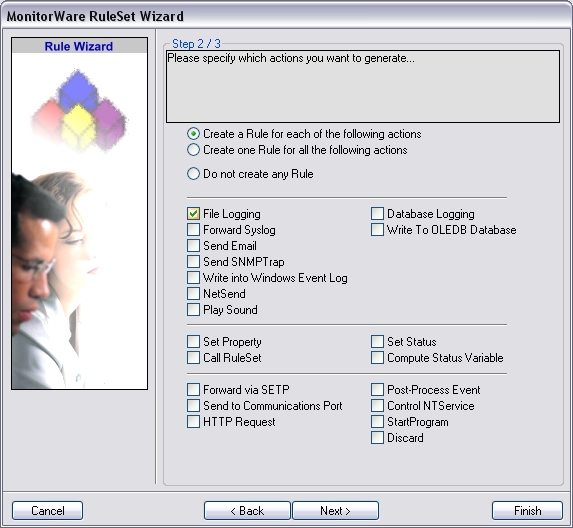
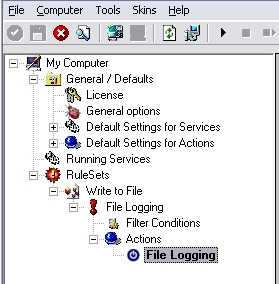
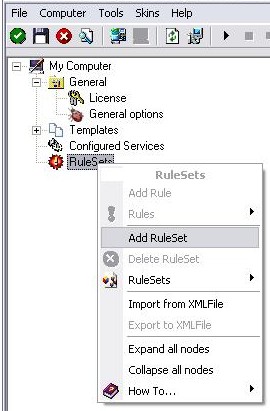
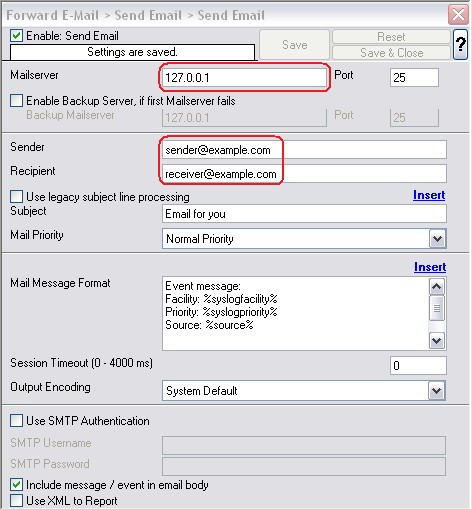
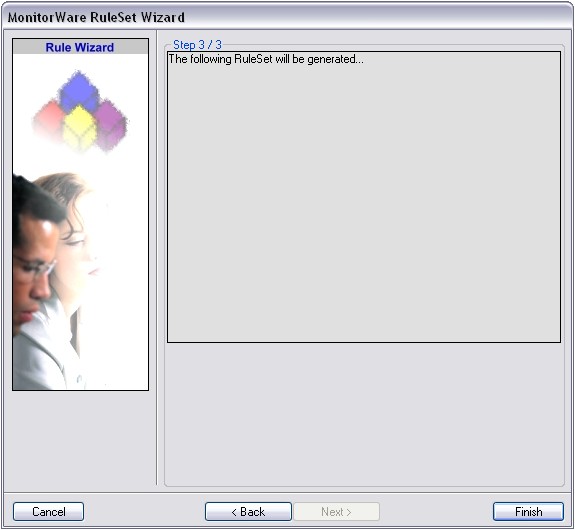
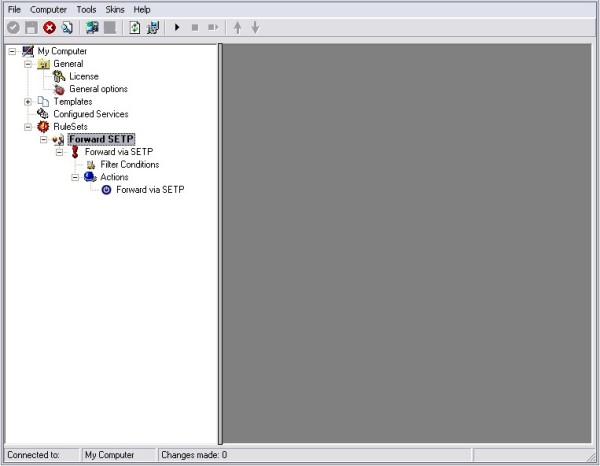
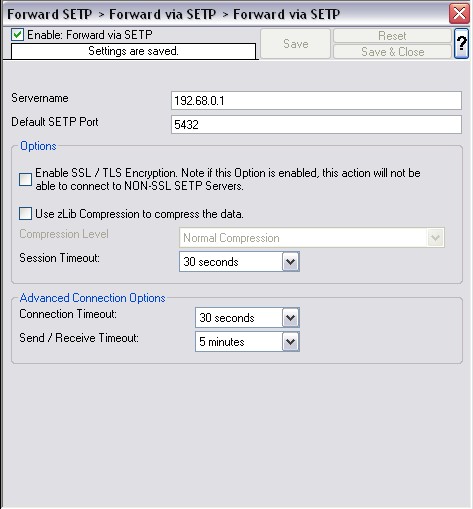
The first step we are gonna take is to create a RuleSet with the corresponfing action. In this case we want to forward our logs via syslog. Therefore we need a “Forward via syslog”-Action. Instructions on how to create a ruleset and setup the action can be found here:
How to Setup a Forward via Syslog Action
Please Note:This is a general guide, you may have to adapt some steps.

Step 2

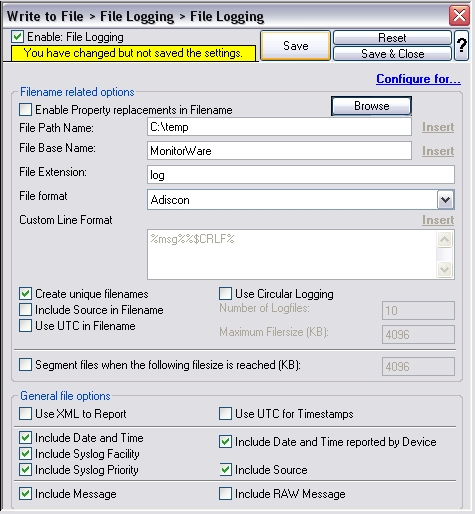
The next important step is to setup the FileMonitor. We need it to monitor the textfile logs created by your ISA server.
How to Setup the FileMonitor Service
Please Note:This is a general guide, you may have to alter the path- and filename.
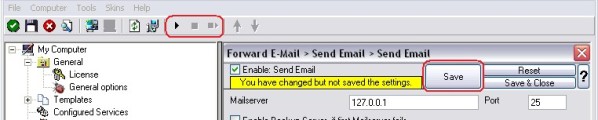
Step 3

The last and final step is to click on the Save button if necessary and then start MonitorWare Agent. You are now done. Finally you should receive all the log entries of your EventLog as well as from your ISA Firewall on your syslog server.

Database Formats

Database Formats

These sample here implement the MonitorWare Common Database Format in widely used database systems. Attention Sybase users: the “Message” name is reserved in your database system and cannot be used as a field name. It needs to be changed, otherwise the table create will fail. Be sure to also change it in to client database field name configuration.

  • JET (MS Access) Sample
  • Microsoft SQL Server Sample
  • MySQL

JET (MS Access) Sample -A sample JET (Microsoft Access) database file is included in the MonitorWare Agent, EventReporter and WinSyslog install set. It conforms to the MonitorWare Common Database format. It is in Microsoft Access 97 format to enhance compatibility. It can be converted to any more current format without any problems. In fact, we recommend using the most current format supported by your system because it offers the best performance. To convert it, please use Microsoft Access.

Microsoft SQL Server Sample – If you would like to create the default database on Microsoft SQL server, please use the following script:

CREATE TABLE.SystemEvents
(
ID int IDENTITY (1, 1) NOT NULL,
CustomerID bigint,
ReceivedAt datetime NULL,
DeviceReportedTime datetime NULL,
Facility smallint NULL,
Priority smallint NULL,
FromHost nvarchar (60) NULL,
Message text,
NTSeverity int NULL,
Importance int NULL,
EventSource nvarchar (60),
EventUser nvarchar (60) NULL,
EventCategory int NULL,
EventID int NULL,
EventBinaryData text NULL,
MaxAvailable int NULL,
CurrUsage int NULL,
MinUsage int NULL,
MaxUsage int NULL,
InfoUnitID int NULL ,
SysLogTag varchar(60),
EventLogType varchar(60),
GenericFileName VarChar(60),
SystemID int NULL,
Checksum int NULL
)

CREATE TABLE.SystemEventsProperties
(
ID int IDENTITY (1, 1) NOT NULL ,
SystemEventID int NULL ,
ParamName varchar (255) NULL ,
ParamValue varchar(255) NULL
)

MySQL Sample – If you would like to create the default database on MySQL, please use the following script:

CREATE TABLE SystemEvents
(
ID int unsigned not null auto_increment primary key,
CustomerID bigint,
ReceivedAt datetime NULL,
DeviceReportedTime datetime NULL,
Facility smallint NULL,
Priority smallint NULL,
FromHost varchar(60) NULL,
Message text,
NTSeverity int NULL,
Importance int NULL,
EventSource varchar(60),
EventUser varchar(60) NULL,
EventCategory int NULL,
EventID int NULL,
EventBinaryData text NULL,
MaxAvailable int NULL,
CurrUsage int NULL,
MinUsage int NULL,
MaxUsage int NULL,
InfoUnitID int NULL ,
SysLogTag varchar(60),
EventLogType varchar(60),
GenericFileName VarChar(60),
SystemID int NULL,
Checksum int NULL
)

CREATE TABLE SystemEventsProperties
(
ID int unsigned not null auto_increment primary key,
SystemEventID int NULL ,
ParamName varchar(255) NULL ,
ParamValue varchar(255) NULL
)

This script should also be easily adaptable to other database systems like Oracle.

When porting the script to other database systems, please note that “nvarchar” is essentially “varchar”. The difference is that data is stored in Unicode which allows storage of non-ANSI characters. Typically, it can be replaced with “varchar” or an equivalent data type without any problems.

How To setup a Forward via Syslog Action

How To setup a Forward via Syslog Action

Article created 2007-02-15 by Florian Riedl.

1. First we define a new rule set. Right-click “Rules”. A pop up menu will appear. Select “Add Rule Set” from this menu. On screen, it looks as follows:

2. Then, a wizard starts. Change the name of the rule to whatever name you like. We will use “Forward syslog” in this example. The screen looks as follow:


Click “Next” to go on with the next step.

3. Select only Forward via Syslog. Do not select any other options for this sample. Also, leave the “Create a Rule for each of the following actions” setting selected. Click “Next”. You will see a confirmation page. Click “Finish” to create the rule set.

4. As you can see, the new Rule Set “Forward syslog” is present. Please expand it in the tree view until the action level of the “Forward syslog” Rule and select the “Forward syslog” action to configure.

5. Now, we are going to configure the necessary settings for forwarding via syslog. Type the IP or the hostname of your syslog server into the Syslog Server field in the form. That’s it. You can change the port and protocol if necessary, else leave them on their default value.

6. Finally, make sure you press the “Save” button – otherwise your changes will not be applied. Then start the service and you are done.

To what extent MonitorWare Agent 4.x / WinSyslog 7.x Support SNMP?

To what extent MonitorWare Agent 4.x / WinSyslog 7.x Support SNMP?

Created 2007-01-30 by Florian Riedl.

I am using MonitorWare Agent 4.x / WinSyslog 7.x on my NT Server. To what extent MonitorWare Agent 4.x / WinSyslog 7.x Support SNMP?

MonitorWare Agent and WinSyslog are capable of either sending or receiving SNMP Traps. Usually SNMP Traps are used by network devices to report status messages to the managing system. Our products can play either role. They are fully compatible to SNMP v1 and v2c and provide you full enterprise support.

Managing incoming Traps works the same way as with a Syslog server for example. Incoming Traps will be forwarded to the corresponding Ruleset and pass by rule after rule. There it can be filtered for general information like the “Community”, the “Version” or “Value” for example. Finally it will be processed by an action, which you can select to your needs. The SNMP Agent service will co-exist peacefully next to the Windows SNMP Agent and will not hinder it in it’s functionality. The Windows SNMP Agent listens to port 161, while MonitorWare Agent and WinSyslog listen to port 162.

The “Send SNMP Trap”-Action is capable of sending all kinds of Traps. You can choose the whole variety of the MonitorWare Products’ Properties as a value for the messages. With that, you can send SNMP Traps to the Windows internal SNMP Agent or any other device that is able to receive SNMP Traps. Of course you have full enterprise support, too. This gives you the possibility to involve every machine on your network into your security plan or whatever purpose it should serve.

For internal processing, the variables of incoming SNMP messages will be added to a new property. Those properties will be named %snmp_var_x% with the x being a number starting with 1. You can use these custom properties for filtering and everywhere you can use or print properties. For example, you can create a “send mail”-action. Here you can specify complete freely how the message will look like. You can use a introductory text and then let it show the error message in some context. This could look like this:

The result will be, that the 5th property of the snmp trap will be inserted into the message text.

This gives you an overall solution for receiving and sending SNMP Traps. You can create some kind of relay point, or just do some logging for later analysis. While the first versions of our software with SNMP compatibility had just basic features which were targeted towards SOHO devices. Later, enterprise customers asked for SNMP functionalities, which caused us to create a full-blown SNMP implementation with enterprise-class support.

If you need further information about the SNMP implementation, send a mail to our Support.

2007-01-22 MonitorWare Agent 4.3 Final (Build Service 4.3.323/Client 4.3.1099)

MonitorWare Agent 4.3 Released

Build-IDs: Service 4.3.323, Client 4.3.1099

New Additions

  • New EventLog Monitor V2 ServiceA new Service has been added to fully support the new EventLog of Windows Vista. Currently the Service is just called EventLog Monitor V2 and can only be configured and used on Windows Vista or Windows Longhorn Server. This new Service fully supports the new EventLog structure, the new Channels and so on. Please note that this is the initial release of the new EventLog Monitor, slight enhancements and changes will follow in future versions. Currently we fully support Serviced Channels only, which also includes all classic EventLogs. To gain support for fully reading the new Vista EventLog, we highly recommend to use the new Service. Continue reading “2007-01-22 MonitorWare Agent 4.3 Final (Build Service 4.3.323/Client 4.3.1099)”

Creating a Rule Set for Database Logging

Step-By-Step Guides

Article created 2005-04-05 by Hamid Ali Raja.
Last Updated 2007-01-16 by Florian Riedl.

Creating a Rule Set for Database Logging

This is a very quick step-by-step guide. It essentially is a step in multiple configurations. You can refer to this guide whenever you need to add database logging to one of your services.

To define a new rule set, right click “Rules”. A pop up menu will appear. Select “Add Rule Set” from this menu.

Then, a wizard starts. Change the name of the rule set to whatever name you like. We will use “Database Logging” in this example. The screen looks as follows:

Click “Next”. A new wizard page appears:

Select only Database Logging. Do not select any other options for this sample. Also, leave the “Create a Rule for each of the following actions” setting selected. Click “Next”. You will see a confirmation page. Click “Finish” to create the rule set.

The wizard closes and the client shows a newly created rule set.

As you can see, the new Rule Set “Database Logging” is present. Please expand it in the tree view until the action level of the “Database Logging” Rule and select the “Database Logging” action to configure.

Now click on the Data Sources (ODBC) Button to open the ODBC Data Source Administrator. No click on the System DSN tab and click the Add button to add a new System-DSN (Select the Microsoft Access driver like in the screenshot below).

In the next step, click the Select button and go to the Monitorware Agent installation directory (Usually C:\program files\MonitorWare\Agent\) and choose the sample database called sample97.mdb. After that name the new DSN with “MyDatabaseDSN” like in the following screenshot and press OK.

Now close the ODBC Data Source Administrator and switch back to the Monitorware Agent Client and insert MyDatabaseDSN in the DSN field. Leave all other settings in their default.

This finishes the setup for a simple Action for Database Logging.

How To setup a File Logging Action

How To setup a File Logging Action

Article created 2007-01-16 by Florian Riedl.

Please note: This Step By Step Guide works for EventReporter, MonitorWare Agent and WinSyslog.

1. Start the Client.
Then define a new rule set, right click “RuleSets”. A popup menu will appear. Select “Add Rule Set” from this menu. On screen, it looks as follows:


Figure1: Creating the new ruleset

2. Then, a wizard starts. Change the name of the rule to whatever name you like. We will use “Write to File” in this example. The screen looks as follows:


Figure2: Starting the Wizard

3. Click “Next”. A new wizard page appears. Select File Logging. Do not select any other options for this sample. Also, leave the “Create a Rule for each of the following actions” setting selected. Click “Next”. You will see a confirmation page. Click “Finish” to create the rule set.


Figure3: Select File Logging

4. As you can see, the new Rule Set “Write to File” is present. Please fully expand it in the tree view until the File Logging action appears.


Figure4: Expanding the tree

5. Now, type the File Path Name and the relevant information for file logging.
Note: By default the File Path Name is c:\temp (you can replace this with your desired values). In older Versions of MonitorWare Agent, WinSyslog and EventReporter the missing directory wasn’t created. So make sure that this folder exists on the desired drive. The latest versions MonitorWare Agent, WinSyslog and EventReporter do create the missing folder.


Figure5: The file logging action

Note: Make sure you press the “Save” button – otherwise your changes will not be applied. Now you must restart the service for the changes to have an effect.

How To setup an Send Mail Action

How To setup an Send Mail Action

Article created 2006-12-22 by Florian Riedl.

1. First we define a new rule set. Right-click “Rules”. A pop up menu will appear. Select “Add Rule Set” from this menu. On screen, it looks as follows:

2. Then, a wizard starts. Change the name of the rule to whatever name you like. We will use “Forward E-Mail” in this example. The screen looks as follow:


Click “Next” to go on with the next step.

3. Select only Send Email. Do not select any other options for this sample. Also, leave the “Create a Rule for each of the following actions” setting selected. Click “Next”. You will see a confirmation page. Click “Finish” to create the rule set.

4. As you can see, the new Rule Set “Forward E-Mail” is present. Please expand it in the tree view until the action level of the “Send Email” Rule and select the “Send Email” action to configure.

5. Now, we are going to configure the necessary settings for sending emails. Type the IP or the hostname of your SMTP mailserver into the Mailserver field in the form. Then choose a sender email adress and of course the adress of the recipient for the notifications.

6. Finally, make sure you press the “Save” button – otherwise your changes will not be applied. Then start the service and you are done.

How To setup an SETP Action

How To setup an SETP Action

Article created 2005-04-21 by Hamid Ali Raja.
Last Updated 2006-12-21 by Florian Riedl.

1. First we have to define a new rule set, right click on “Rules”. A pop up menu will appear. Select “Add Rule Set” from this menu. On screen, it looks as follows:

2. Then, a wizard starts. Change the name of the rule to whatever name you like. We will use “Forward SETP” in this example. The screen looks as follow:


Click “Next”. A new wizard page appears.

3. Select only Forward by SETP. Do not select any other options for this sample. Also, leave the “Create a Rule for each of the following actions” setting selected.

Click “Next”. You will see a confirmation page.


Click “Finish” to create the rule set.

4. As you can see, the new Rule Set “Forward SETP” is present. Please expand it in the tree view until the action level of the “Forward SETP” Rule and select the “Forward by SETP” action to configure.

5. Now, type the IP address or host name of our central hub server in the “Servername” field:

6. Make sure you press the “Save” button – otherwise your changes will not be applied.