MonitorWare Agent 9.0 Released
Build-IDs: Service 9.0.0.425, Client 9.0.0.1377
Features |
|
Bugfixes |
|
You can download Free Trial Version of MonitorWare Agent.
Log Consolidator and Alerter
Build-IDs: Service 9.0.0.425, Client 9.0.0.1377
Features |
|
Bugfixes |
|
You can download Free Trial Version of MonitorWare Agent.
Last Update 2013-01-02 by Florian Riedl
A mass rollout in the scope of this topic is any case where the product is rolled out to more than 5 to 10 machines and this rollout is to be automated. This is described first in this article. A special case may also be where remote offices shall receive exact same copies of the product (and configuration settings) but where some minimal operator intervention is acceptable. This is described in the second half of this article.
The common thing among mass rollouts is that the effort required to set up the files for unattended distribution of the configuration file and product executable is less than doing the tasks manually. For less than 5 systems, it is often more economical to repeat the configuration on each machine – but this depends on the number of rules and their complexity. Please note that you can also export and re-import configuration settings, so a hybrid solution may be the best when a lower number of machines is to be installed (normal interactive setup plus import of pre-created configuration settings).
Before considering a mass rollout, be sure to read “The MonitorWare Agent“. This covers necessary background information and most importantly the command line switches.
The basic idea behind a mass rollout is to create the intended configuration on a master (or baseline) system. This system holds the complete configuration that is later to be applied to all other systems. Once that system is fully configured, the configuration will be transferred to all others.
The actual transfer is done with simple operating system tools. The complete configuration is stored in the the registry. Thus, it can be exported to a file. This can be done with the client. In the menu, select “Computer”, then select “Export Settings to Registry File”. A new dialog comes up where the file name can be specified. Once this is done, the specified file contains an exact snapshot of that machine’s configuration.
This snapshot can then be copied to all other machines and put into their registries with the help of regedit.exe.
An example batch file to install, configure and run the service on “other” servers might be:
copy \\server\share\mwagent.exe c:\some-local-dir
copy \\server\share\mwagent.pem c:\some-local-dir
cd \some-local-dir
mwagent -i
regedit /s \\server\share\configParms.reg
net start "AdisconMonitoreWareAgent"
Please note: These files are needed if you are using MonitorWare Agent 8.1 and above. If you are using a older version, you additionally need the files Microsoft.VC90.CRT.manifest, libeay32.dll, ssleay32.dll, msvcm90.dll, msvcp90.dll and msvcr90.dll.
The file “configParams.reg” would be the registry file that had been exported with the configuration client.
Of course, the batch file could also operate off a CD – a good example for DMZ systems which might not have Windows networking connectivity to a home server.
Please note that the above batch file fully installs the product – there is no need to run the setup program at all. All that is needed to distribute the service i.e. mwagent.exe and its helper dlls, which are the core service. For a locked-down environment, this also means there is no need to allow incoming connections over Windows RPC or NETBIOS for an engine only install.
Please note that, in the example above, “c:\some-local-dir” actually is the directory where the product is being installed. The “mwagent -i” does not copy any files – it assumes they are already at their final location. All “mwagent -i” does is to create the necessary entries in the system registry so that the MonitorWare Agent is a registered system service.
You can use engine-only install also if you would like to distribute a standardized installation to branch office administrators. Here, the goal is not to have everything done fully automatic, but to ensure that each local administrator can set up a consistent environment with minimal effort.
You can use the following procedure to do this:
Important: The directory created in step 6 actually is the program directory. Do not delete this directory or the files contained in it once you are finished. If you would do, this would disable the product (no program files would be left on the system).
If you need to update an engine-only installation, you will probably only upgrade the master installation and then distribute the new exe files and configuration in the same way you distributed the original version. Please note that it is not necessary to uninstall the application first for an upgrade – at least not as long as the local install directory remains the same. It is, however, vital to stop the service, as otherwise the files can not be overwritten.
Adiscon is proud to announce the 8.2a release of MonitorWare Agent. This is a minor release.
This release contains a bugfix concerning the EventLog Monitor.
For more details read the version history
Version 8.2a is a free download. Customers with existing 11.x keys can contact our Sales department for upgrade prices. If you have a valid Upgrade Insurance ID, you can request a free new key by sending your Upgrade Insurance ID to sales@adiscon.com. Please note that the download enables the free 30-day trial version if used without a key – so you can right now go ahead and evaluate it.
Build-IDs: Service 8.2.419, Client 8.2.1358
Features |
|
Bugfixes |
|
You can download Free Trial Version of MonitorWare Agent.
Adiscon is proud to announce the 8.2 release of MonitorWare Agent. This is a minor release.
This release contains new features for the File Monitor, Database Monitor and the Write to File Action as well as a bugfix for the SNMP Trap Receiver.
For more details read the version history
Version 8.2 is a free download. Customers with existing 11.x keys can contact our Sales department for upgrade prices. If you have a valid Upgrade Insurance ID, you can request a free new key by sending your Upgrade Insurance ID to sales@adiscon.com. Please note that the download enables the free 30-day trial version if used without a key – so you can right now go ahead and evaluate it.
Build-IDs: Service 8.2.418, Client 8.2.1358
Features |
|
Bugfixes |
|
You can download Free Trial Version of MonitorWare Agent.
Adiscon is proud to announce the 8.1 release of MonitorWare Agent. This release includes performance enhancements and bugfixes.
With this release, we offer support for the “CEE enhanced Syslog Format“, a format that intends to ease event processing. A multi-vendor community including Red Hat, MITRE, Balabit and Adiscon will build a better logging infrastructure and CEE enhanced syslog is a major building block. Adiscon is proud to be the first vendor to offer support for this format inside a tool for Microsoft Windows.
There is also an overall performance boost in the core engine. Also UDP Spoofing for IPv4 is now supported.
For more details read the version history
Version 8.1 is a free download. Customers with existing 11.x keys can contact our Sales department for upgrade prices. If you have a valid Upgrade Insurance ID, you can request a free new key by sending your Upgrade Insurance ID to sales@adiscon.com. Please note that the download enables the free 30-day trial version if used without a key – so you can right now go ahead and evaluate it.
Build-IDs: Service 8.1.414, Client 8.0.1351
Features |
|
Bugfixes |
|
You can download Free Trial Version of MonitorWare Agent.
Article created 2011-09-08 by Tim Eifler.
This Article describes how you transfer full licenses to another device.
The Article is applicable to all versions of EventReporter, MonitorWare Agent and WinSyslog.
1. Start the application.
![]()
2. Export the Settings to a XML file.
Left-click on “Computer”. A new menu will appear. Select “Export Settings to a XML File” from this menu. On the screen, it looks as follows:
![]()
Edit the file name to whatever you like and save the XML File.
![]()
3. Transfer the XML File to your new machine
4. Install the application on the new machine.
5. Import the saved Settings from the XML File.
Left-click on “Computer”. A new menu will appear. Select “Import Settings to a XML File” from this menu. On the screen, it looks as follows:
![]()
Search your XML File and make a Left-Click on the file. Then press on Open.
![]()
6. Click “Yes”. After this please restart the program.
![]()
7. Check if the license key has been transferred correctly and start the service. You can see it in the Headline “Basic Edition licensed to Test-Key(Your name)”
![]()
That was it.
Conclusion
And this is all you need to do to transfer your License to a new machine.
Article created 2004-09-14 by Timm Herget.
Last Updated 2011-07-27 by Florian Riedl.
This is a very quick step-by-step guide. It essentially is a step in multiple
configurations. You can refer to this guide whenever you need to add
database logging to one of your services.
Though we need to add some sidenotes for issues with 32/64bit systems. If you have a operating system
which is a 64bit edition, the installer for EventReporter, MonitorWare Agent or WinSyslog will automatically
install the appropriate binaries (64bit) on the system. The problem is now, that generally the 32bit drivers for ODBC
would work fine, but 64bit applications can only use drivers that are for 64bit as well. Therefore it is best
to make sure, that you have installed the 64bit ODBC drivers as well. This does only apply for MSSQL and MySQL databases. If you are trying to use a JET database with Adiscon’s products on a 64bit system, you’re in bad luck, since there are no 64bit ODBC drivers available.
MSSQL Enterprise Manager
1. To create a new Database, open up the Microsoft SQL Enterprise Manager.
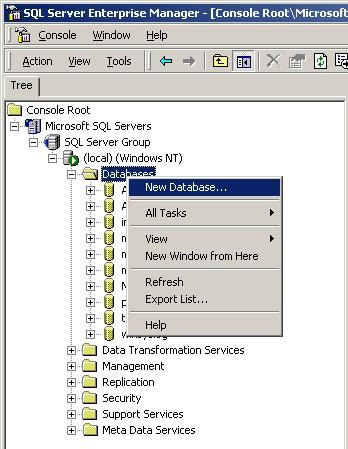
2. Right-click on “Databases” and select “New Database”.
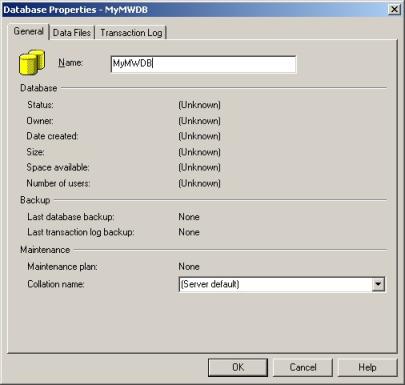
3. Select a Database Name there and click “OK”.
ODBC Data Source Administrator
After you created the new Database, go to the Control Panel -> Administrative Tools and open up “Data Sources (ODBC)”.
The following Window will appear:
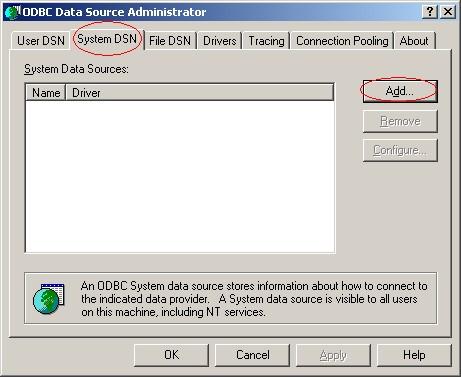
4. Click on “System DSN” and then “Add…”.
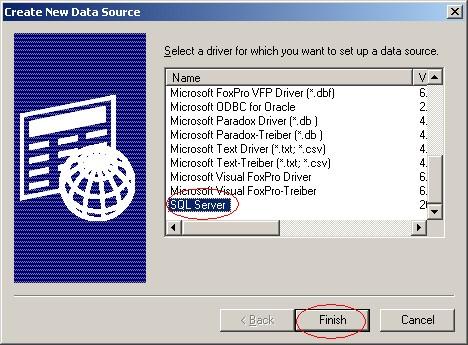
5. Select “SQL Server” as Driver from the List and click “Finish”.
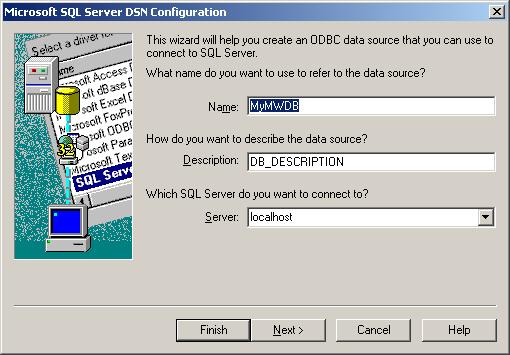
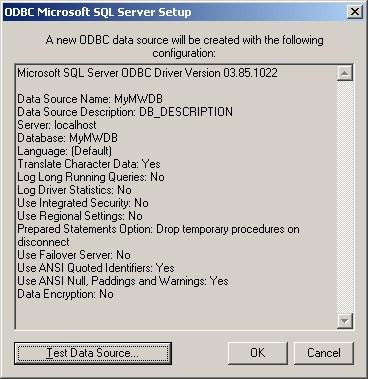
6. Choose a Datasource Name, Description and select the Server where the Database is. In our example we use “localhost”.
Click on “Next”.
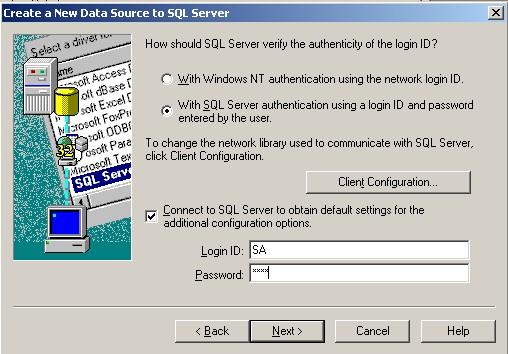
7. Select “SQL Server Authentication” and type in your MSSQL Login ID and Password. Click on “Next”.
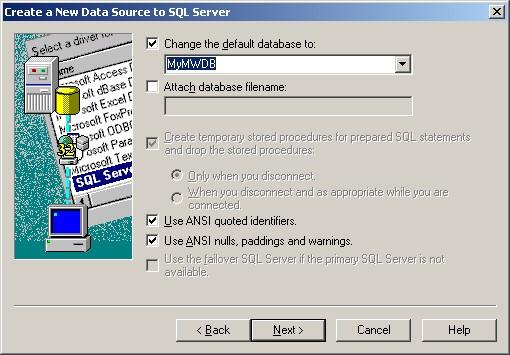
8. Select “Change the default Database to:” and choose your new created Database, in our example we use “MyMWDB”. Click on “Next”.
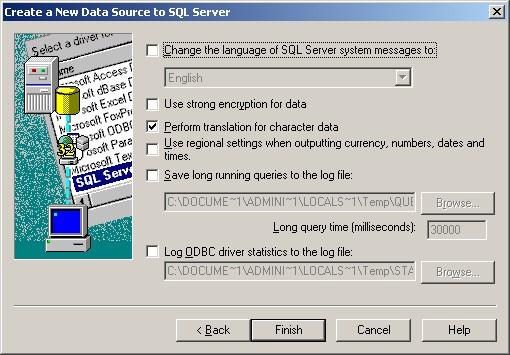
9. Leave all at default settings and click “Finish”, a test Window will appear:
10. Click on “Test Data Source”, normally the following Window should be displayed:
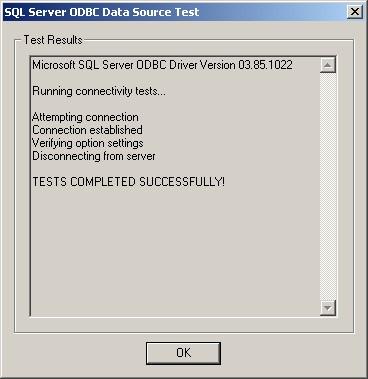
11. If not, go back and check your Settings, if yes, Click “OK” and exit the System-DSN Wizard.
Monitor Ware Line Product
12. To define a new rule set, right click “Rules”. A pop up menu will
appear. Select “Add Rule Set” from this menu.
13. Then, a wizard starts. Change the name of the rule set to whatever name you
like. We will use “Database Logging” in this example. The screen
looks as follows:
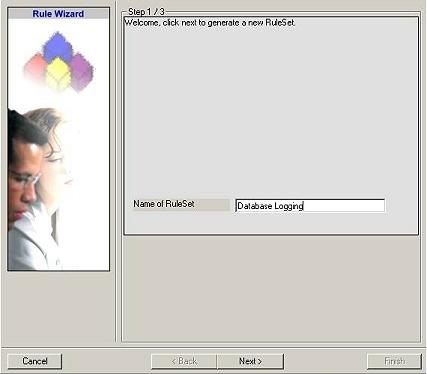
14. Click “Next”. A new wizard page appears:

15. Select only Database Logging. Do not select any other options for this sample.
Also, leave the “Create a Rule for each of the following actions”
setting selected. Click “Next”. You will see a confirmation page.
Click “Finish” to create the rule set.
16. The wizard closes and the client shows a newly created rule set.
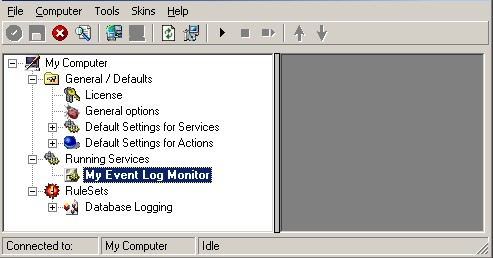
17. As you can see, the new Rule Set “Database Logging” is present. Please
expand it in the tree view until the action level of the “Database
Logging” Rule and select the “Database Logging” action to
configure.
You will see the following Window now:
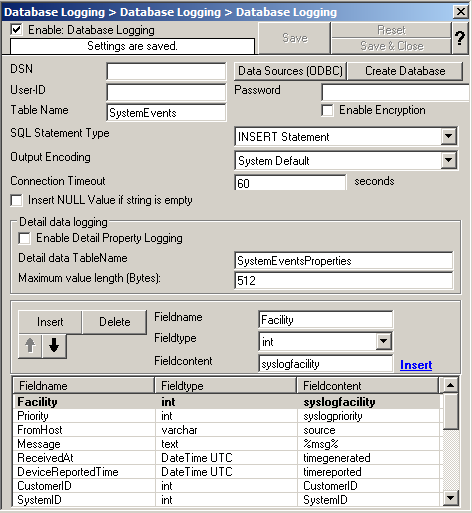
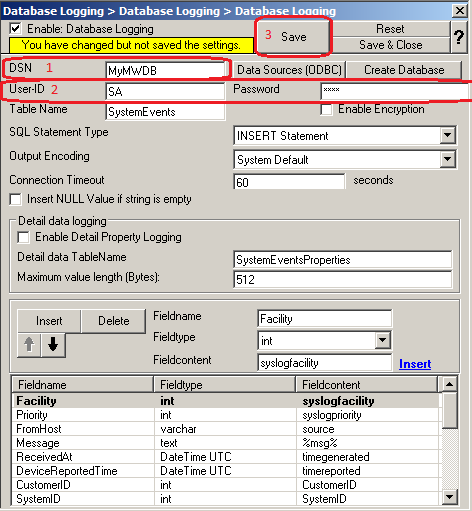
18. Type in your DSN, User-ID and Password now and press “Save”.
19. Click on the “Create Database” Button to let the Programm create the Adiscon-Table-Layout in your Database.
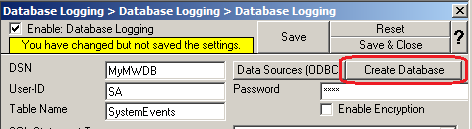
Done 🙂